Macrame Knots – Spiral Stitch
Another macrame knot is the spiral stitch, also called Half Knot Spiral. It is often used for hanging baskets or wall hangings. It is nothing more than a half square knot that rotates on its own axis to create beautiful spiralling strands.
Table of Contents
Spiral Stitch
You need four strands for the spiral stitch. The two in the centre are the filler cords (dark threads) and the two on the outside are the working cords (light threads). It depends on your personal preference whether you want to twist the strand to the left or to the right. It is important that you stick to one direction, otherwise the effect of the twist will be lost.
Right-Facing Spiral
1
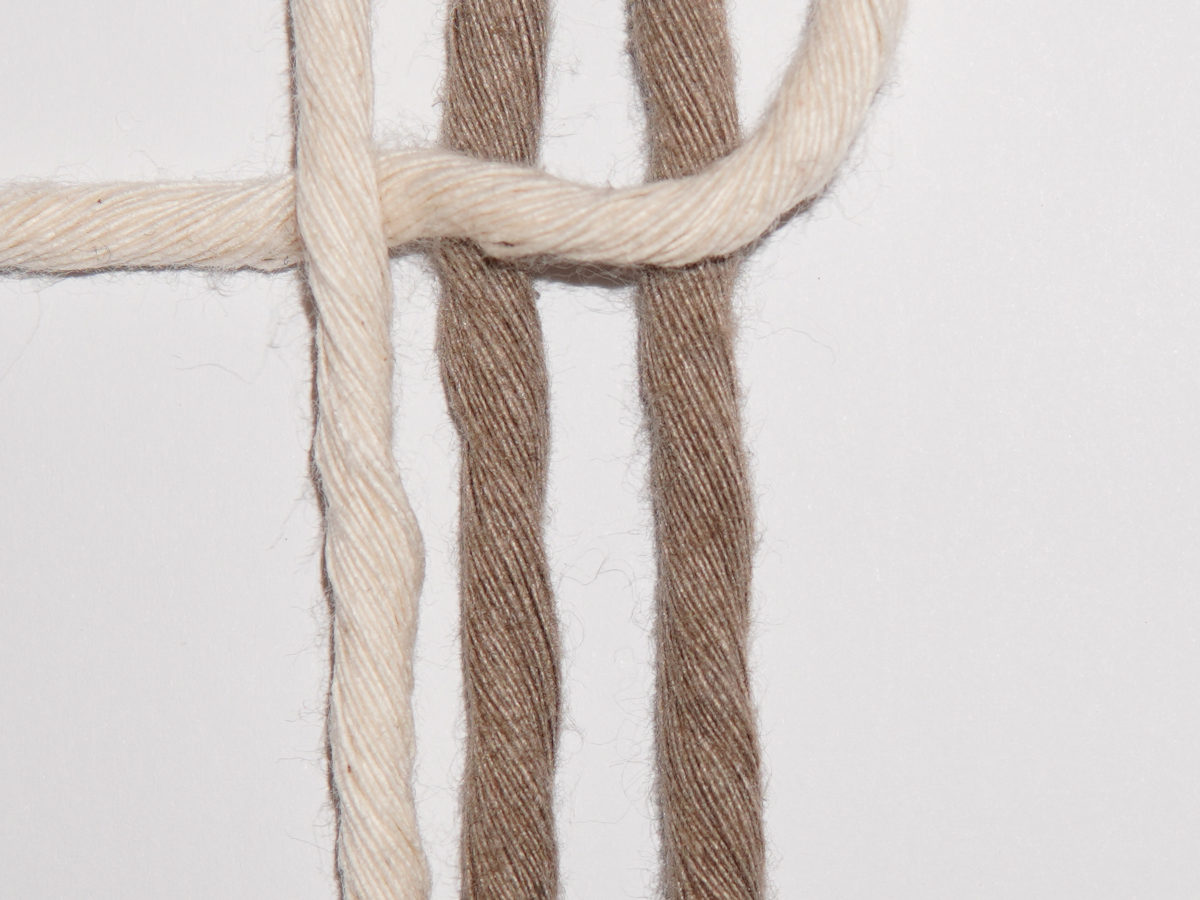
If you want the strand to turn from right to left, take the right working cord, place it over the two filler cords and then under the left working cord.
2
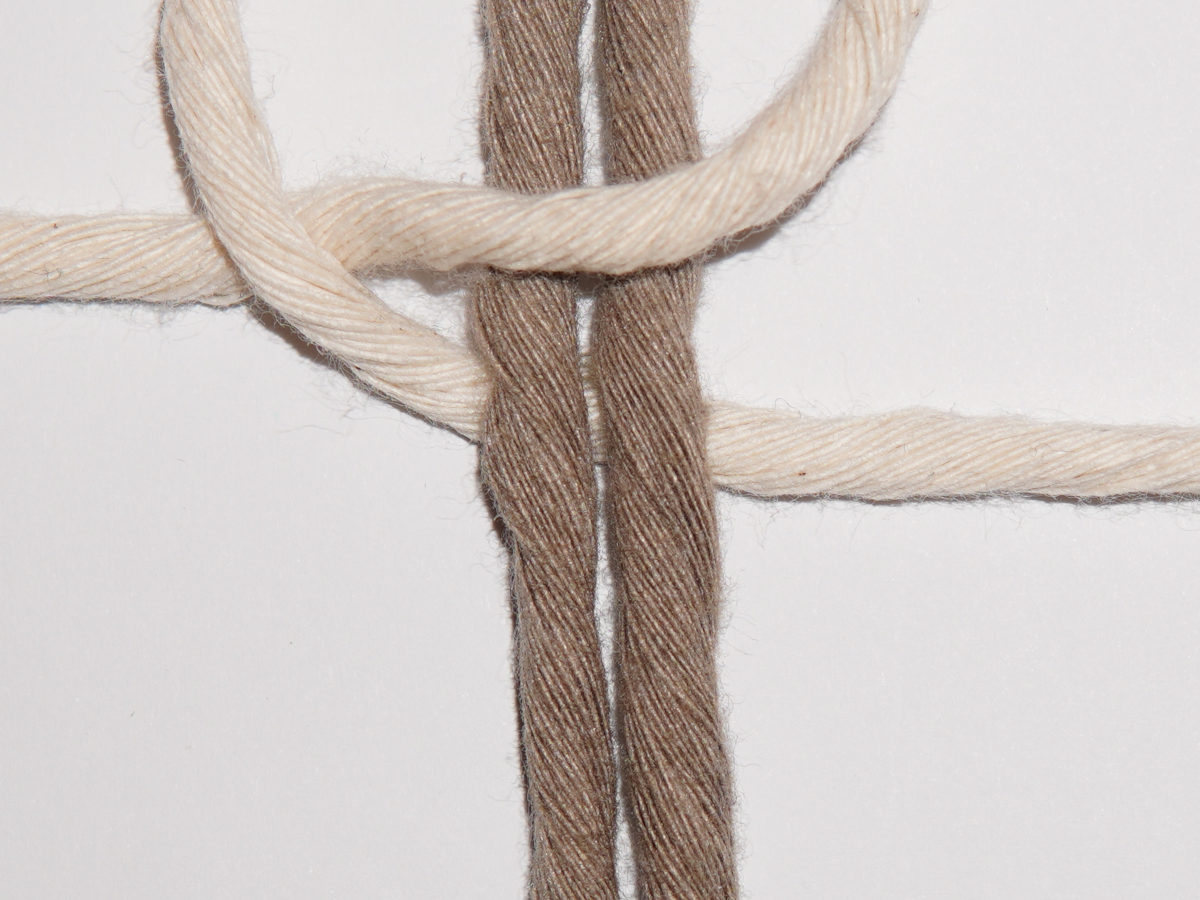
Now take the left working cord and place it under the two filler cords.
3
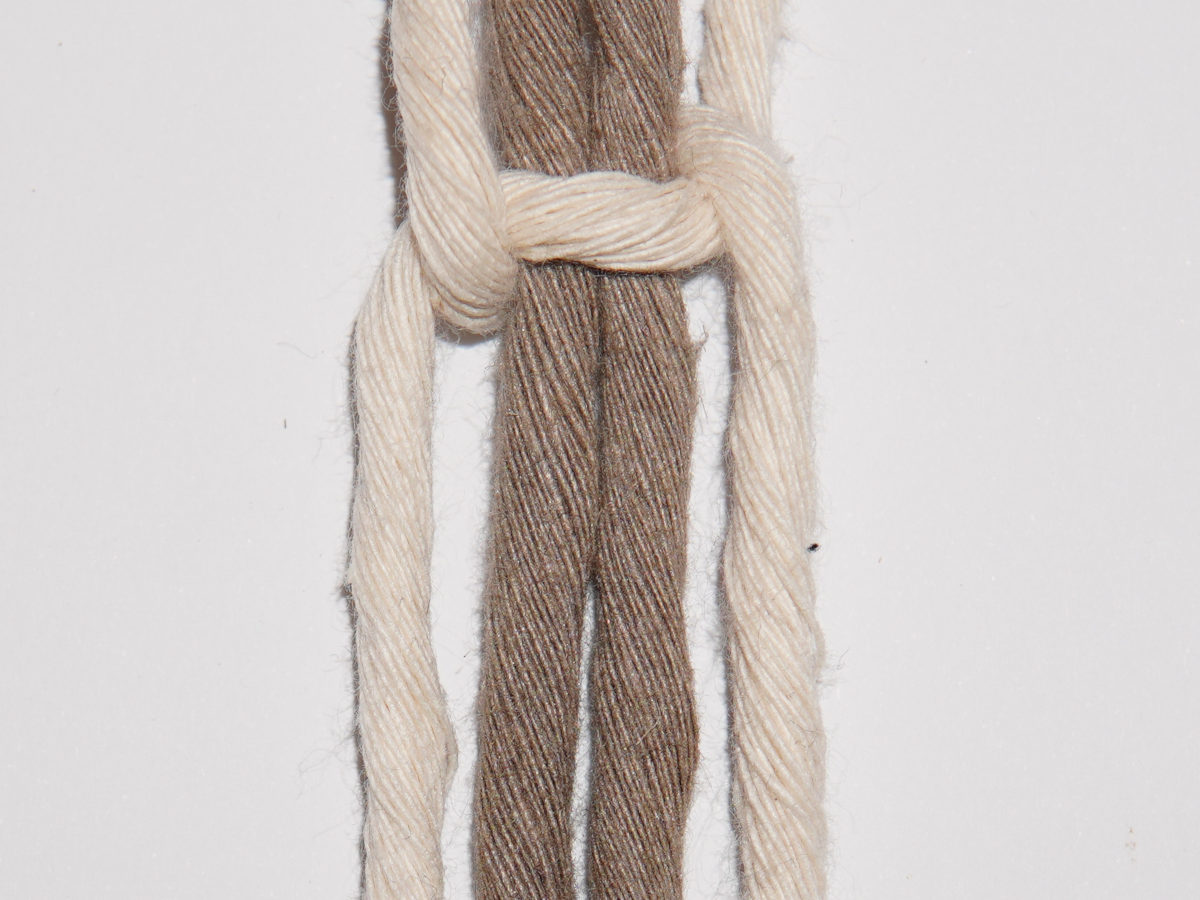
Then pass the left working cord from the back to the front through the loop of the right working cord. This is the half square knot.
4
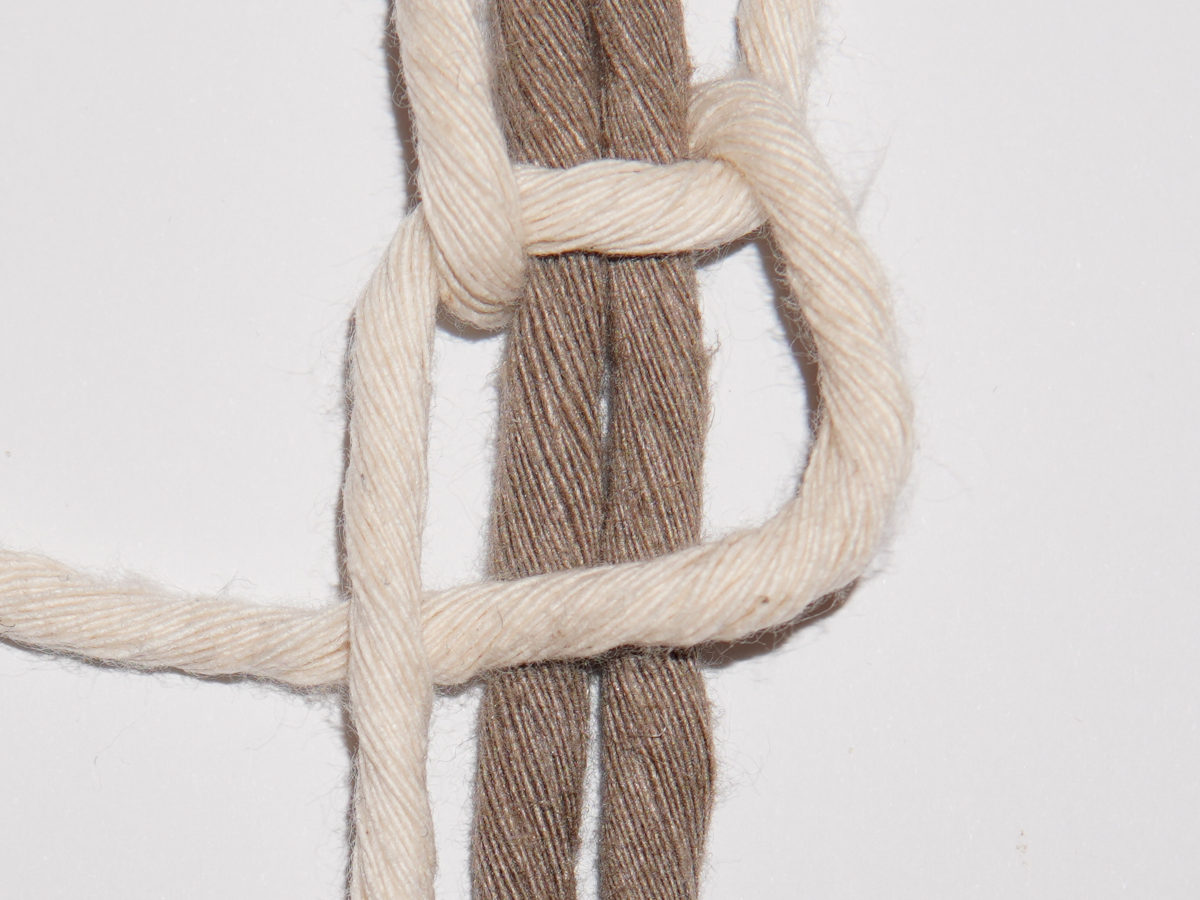
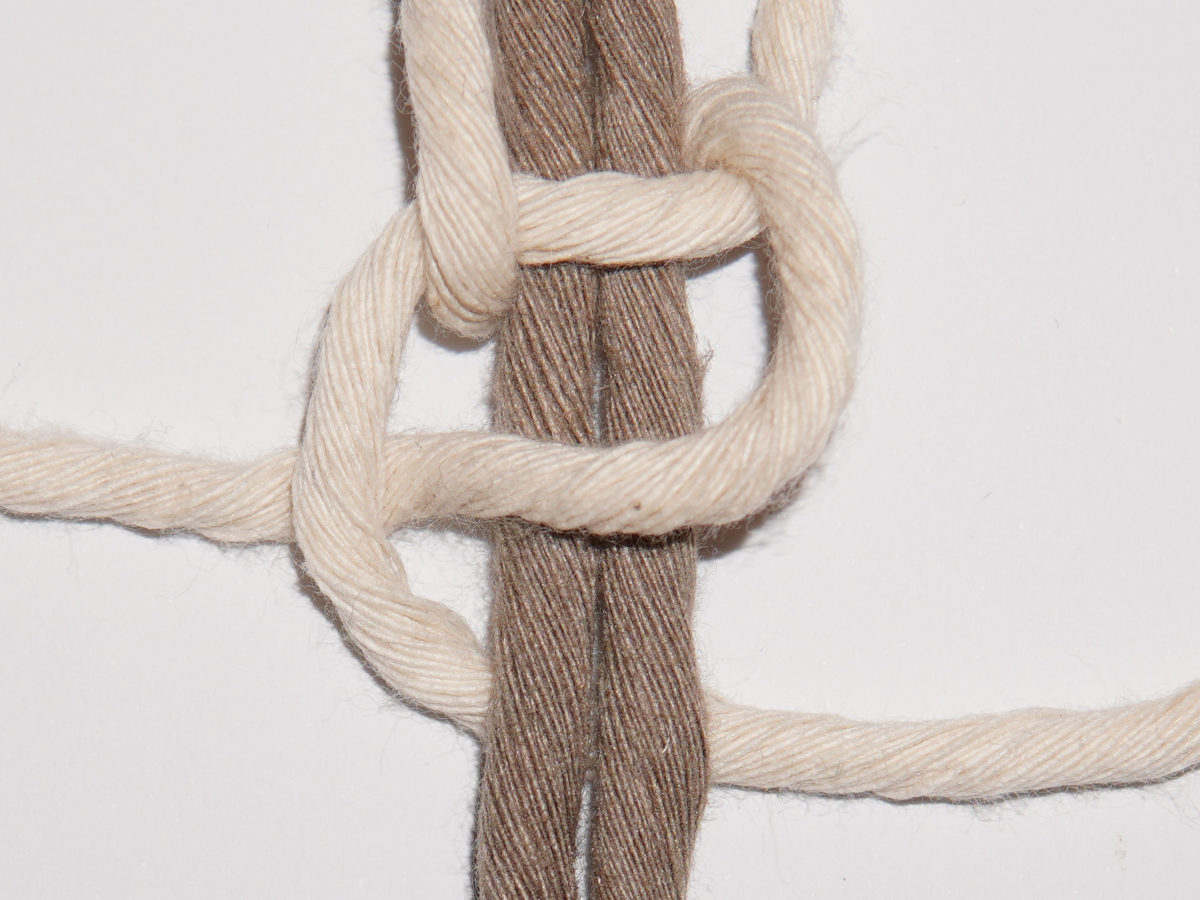
Repeat step 1 by passing the right strand over the two filler cords and under the left working cord.
5
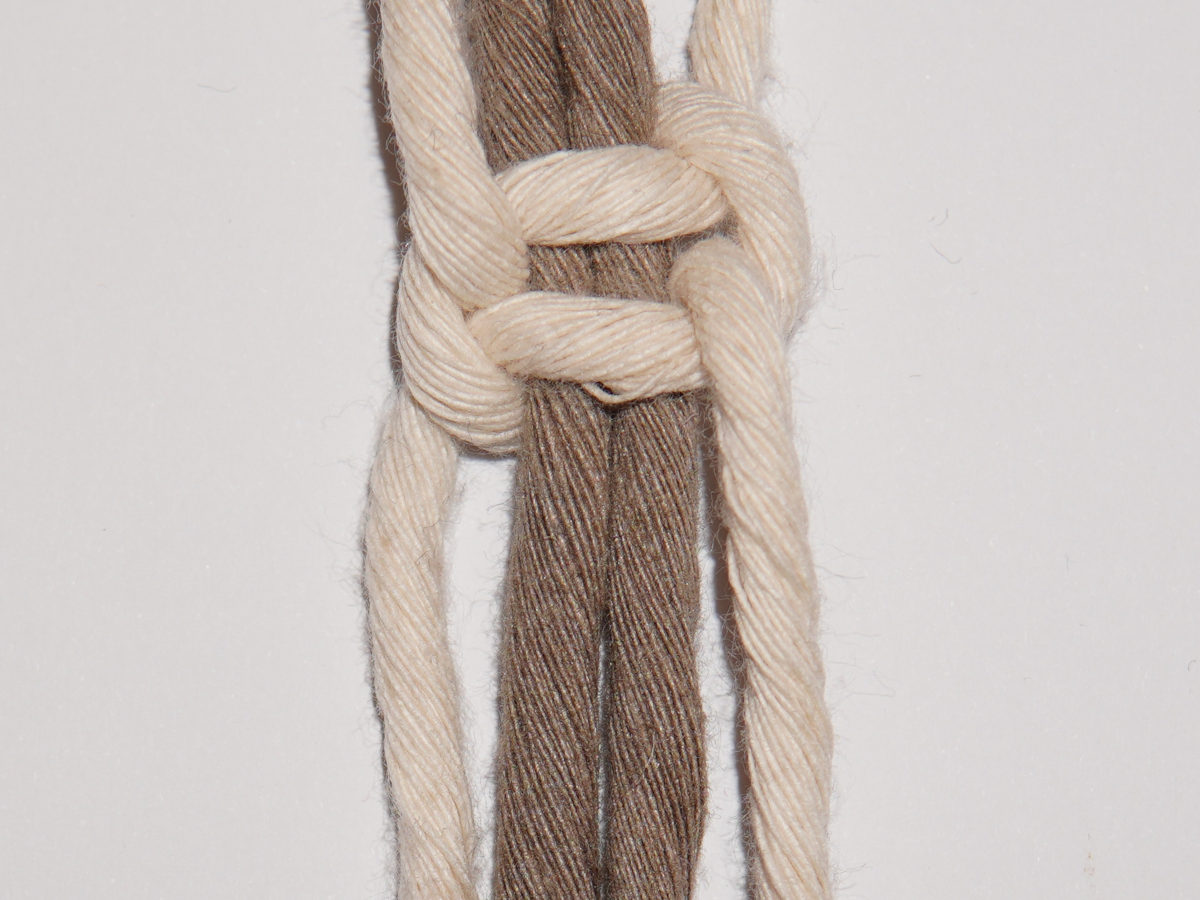
Repeat step 2, so take the left cord and pass it under the two filler cords.
6
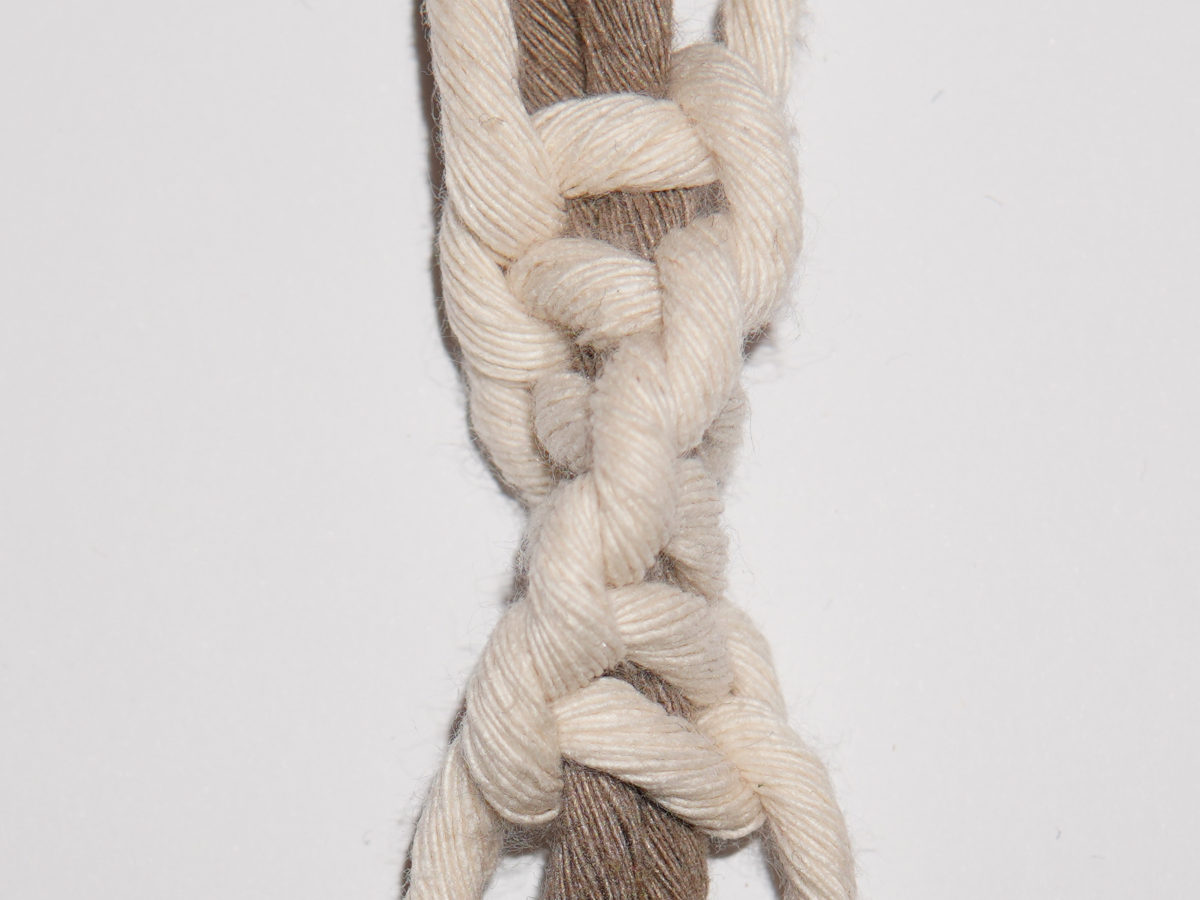
Repeat step 3 by passing the left working cord from the back to the front through the loop of the right working cord. You may already notice that the knotted strand is beginning to twist.
7
Repeat steps 1 to 3 until the strand is the desired length.
Left-Facing Spiral
1
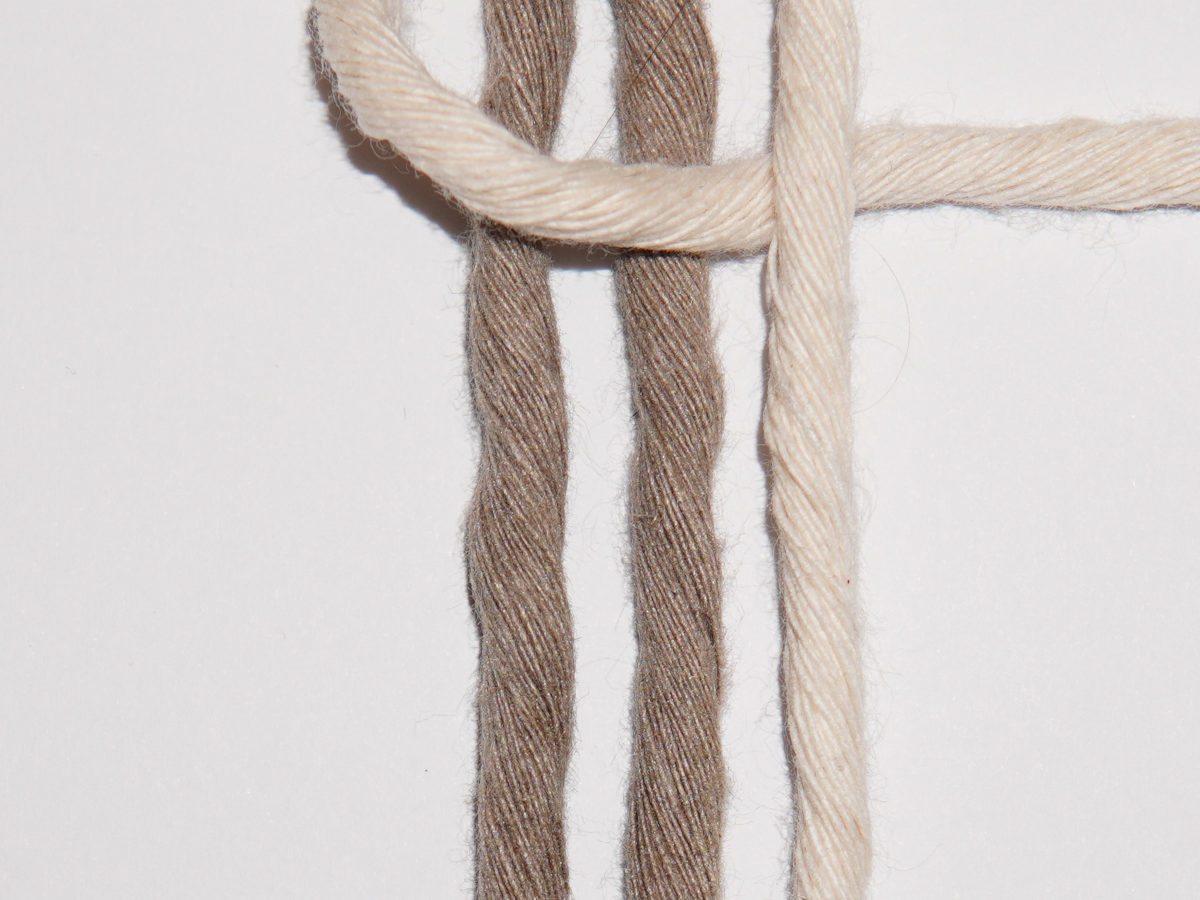
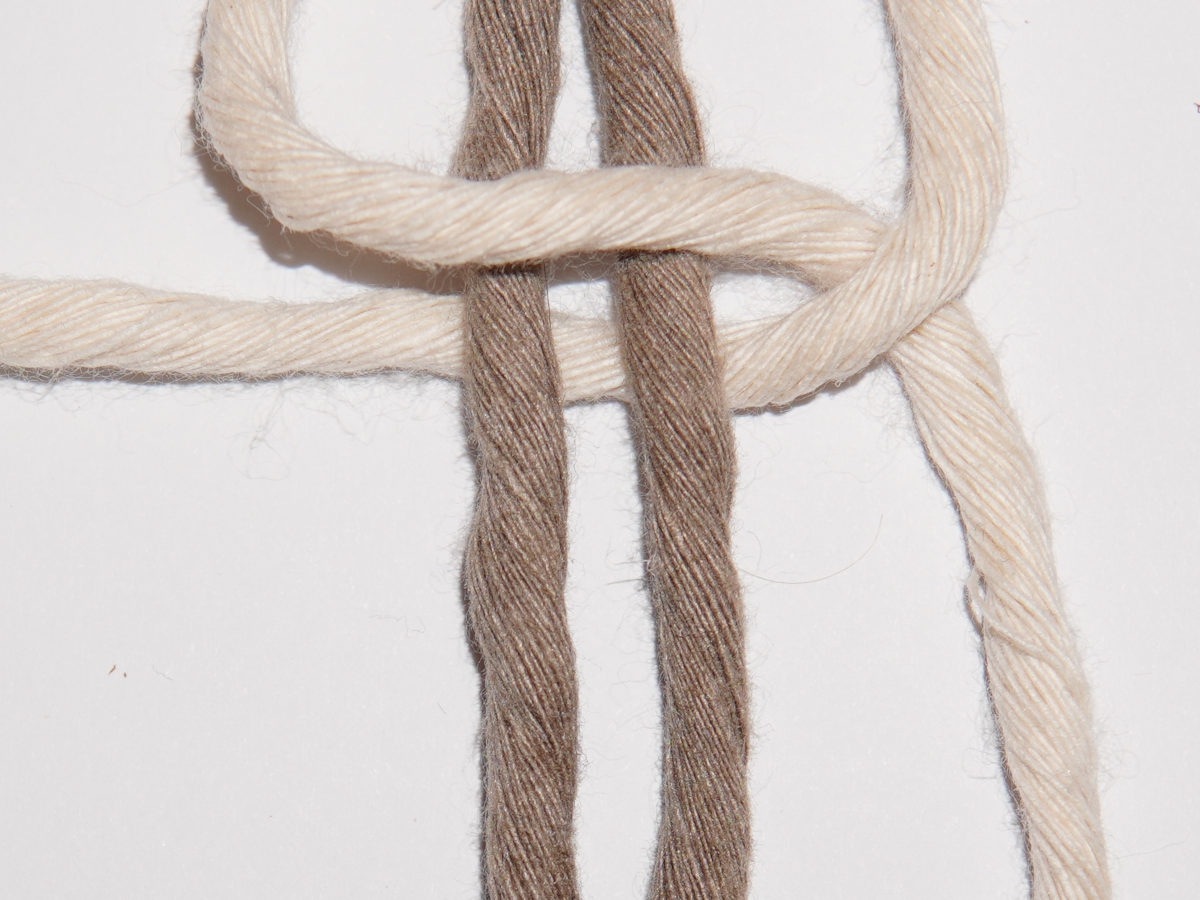
If you want to turn the strand from left to right, take the left working cord, place it over the two filler cords and under the right working cord.
2
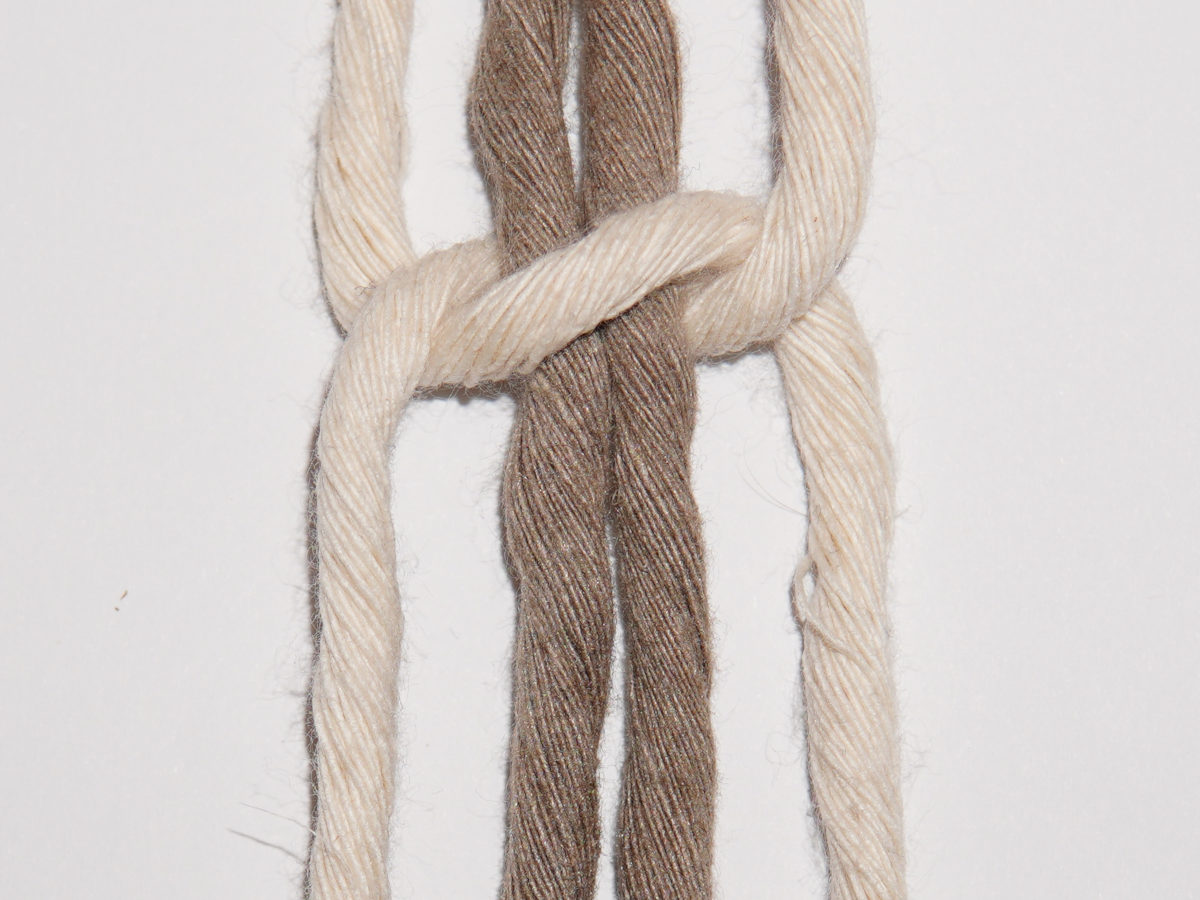
Now take the right working cord and place it under the two filler cords.
3
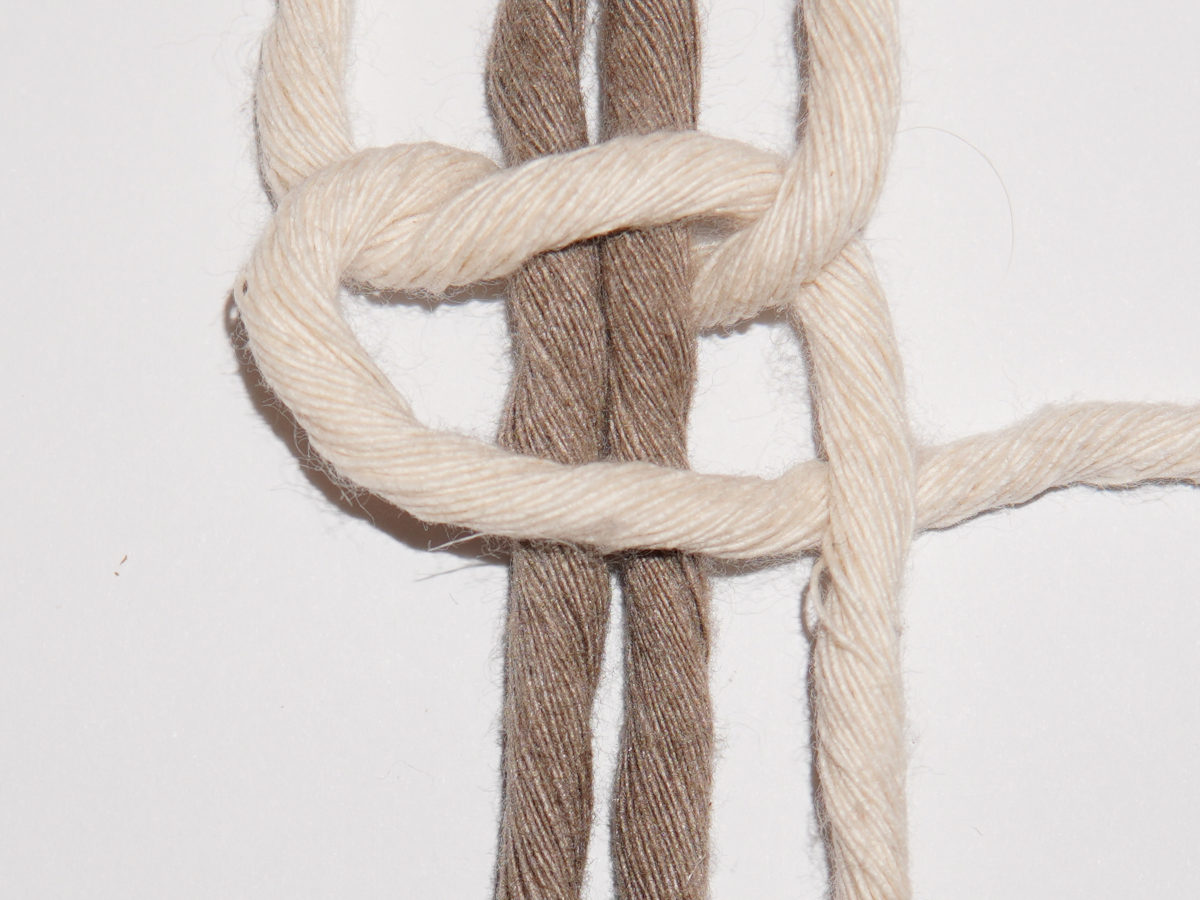
Then pass the right working cord from the back to the front through the loop of the left working cord. You now have a half square knot.
4
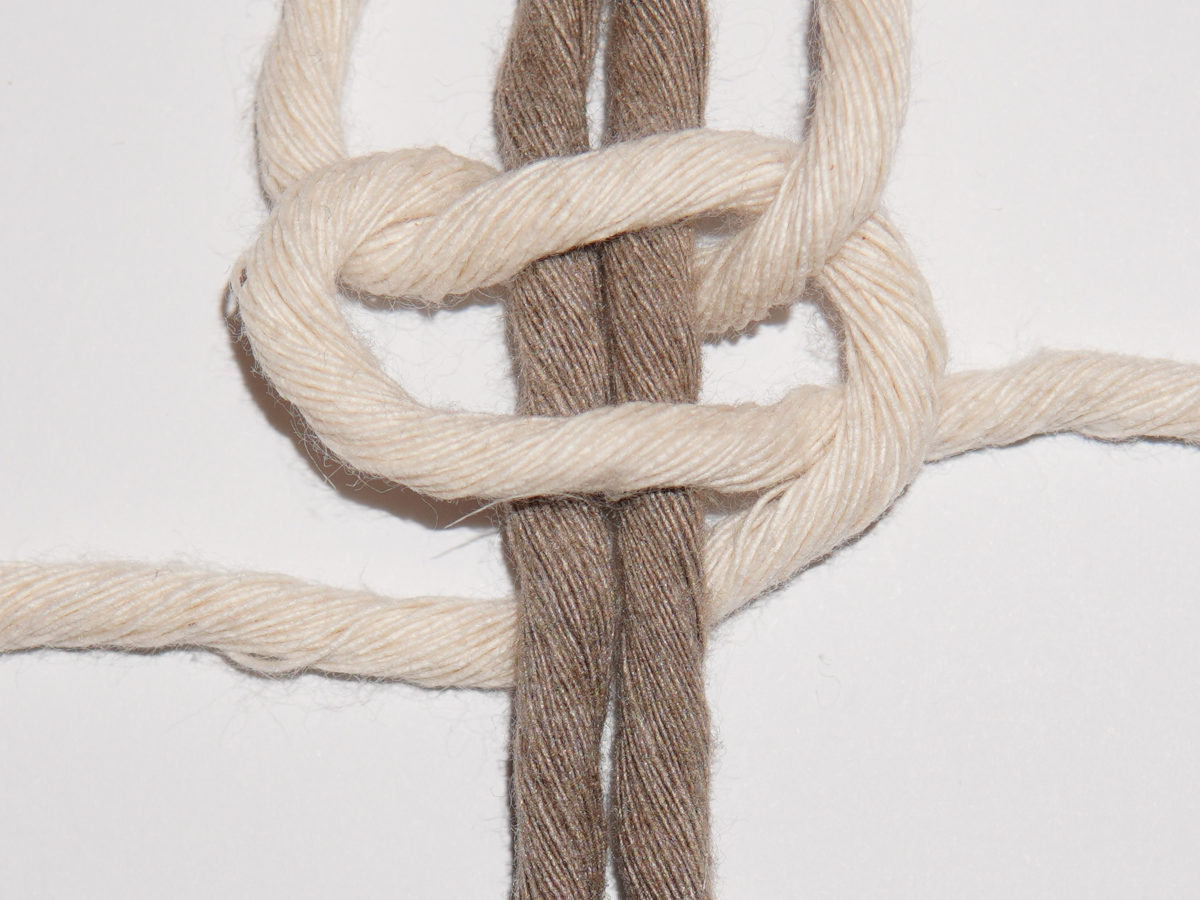
Repeat step 1 by passing the left strand over the two filler cords and under the right working cord.
5
Repeat step 2, so take the right strand and pass it under the two filler cords.
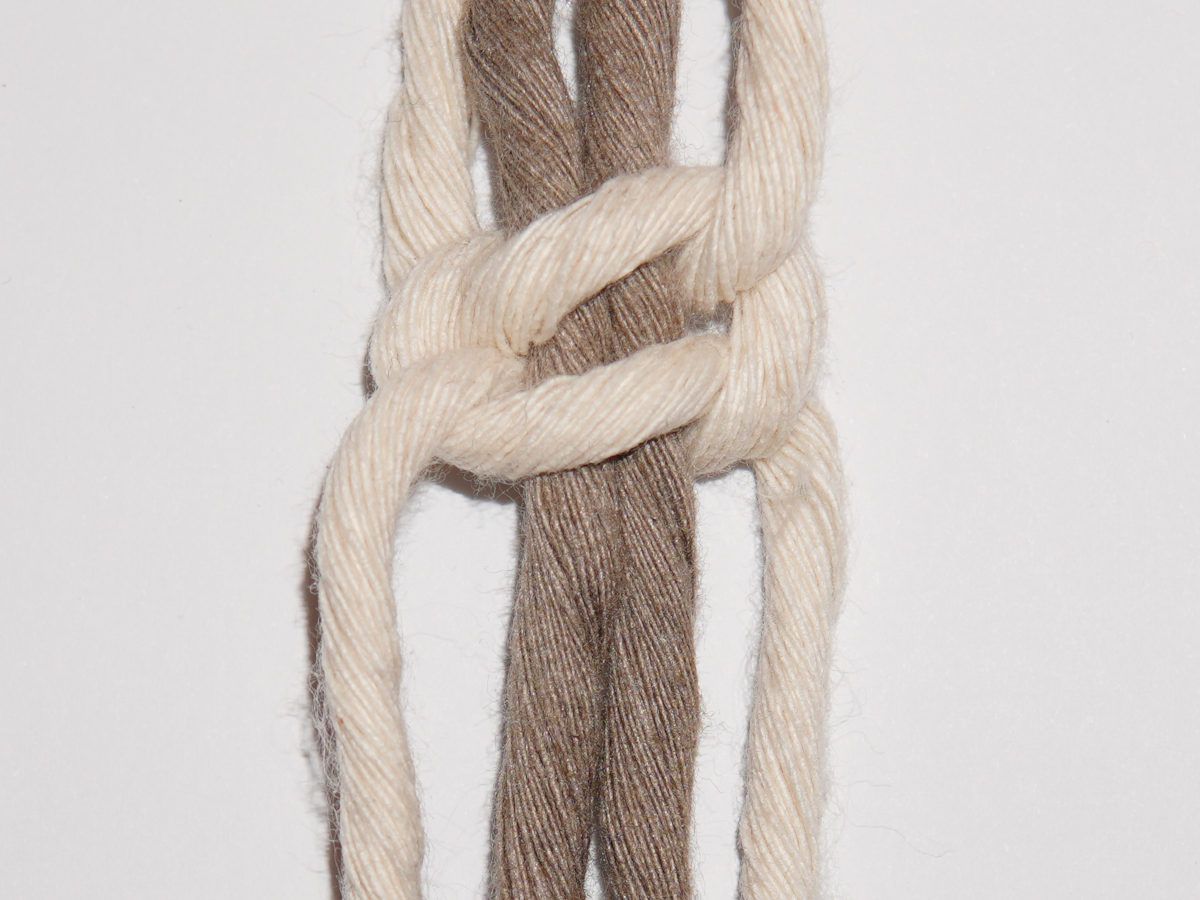
6
Repeat step 3 by passing the right working cord from the back to the front through the loop of the left working cord.
You may already notice that the knotted strand is beginning to twist.
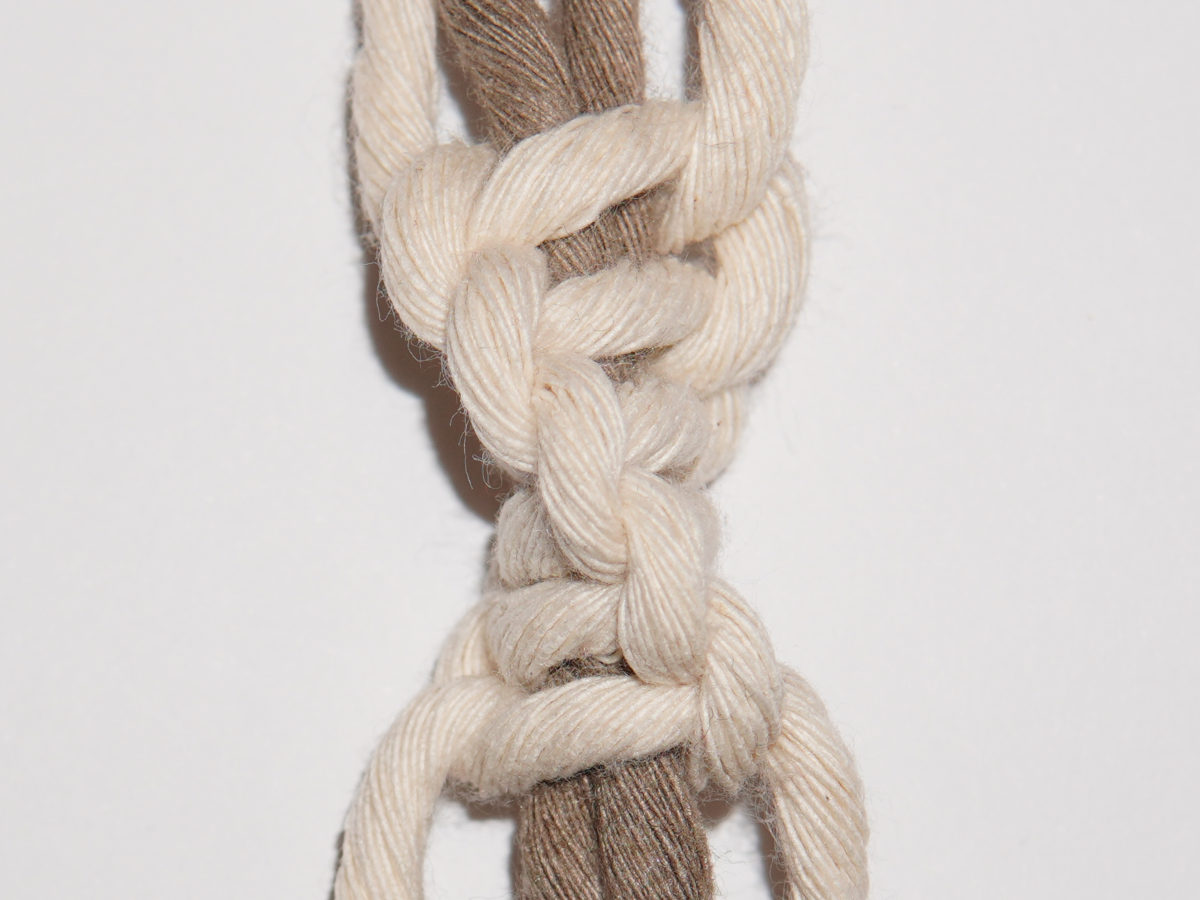
7
Repeat steps 1 to 3 until the strand is the desired length.
Alternating
You can also alternate the spiral stitch to create a beautiful pattern. You can try out for yourself how many half knots the spiral stitch consists of. It would be good if it rotates completely at least once. In this example, we have knotted the single strand from six half knots.
How many cords you need depends on how many strands you want to have next to each other. In our example, we have two strands next to each other, so we need a total of eight cords. You will need another four cords for each additional strand.
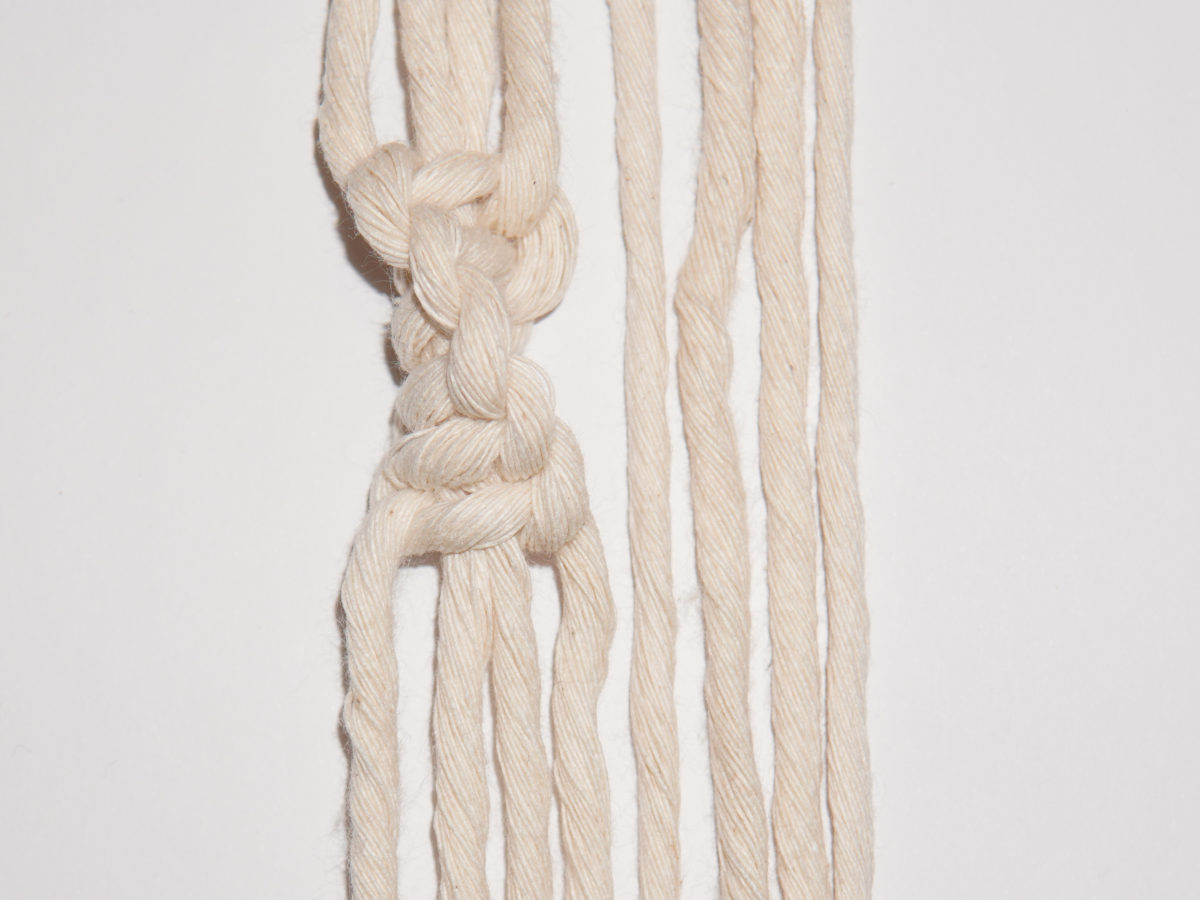
1
First, tie a spiral stitch strand with the four cords on the left as described above. You can decide in which direction it turns.
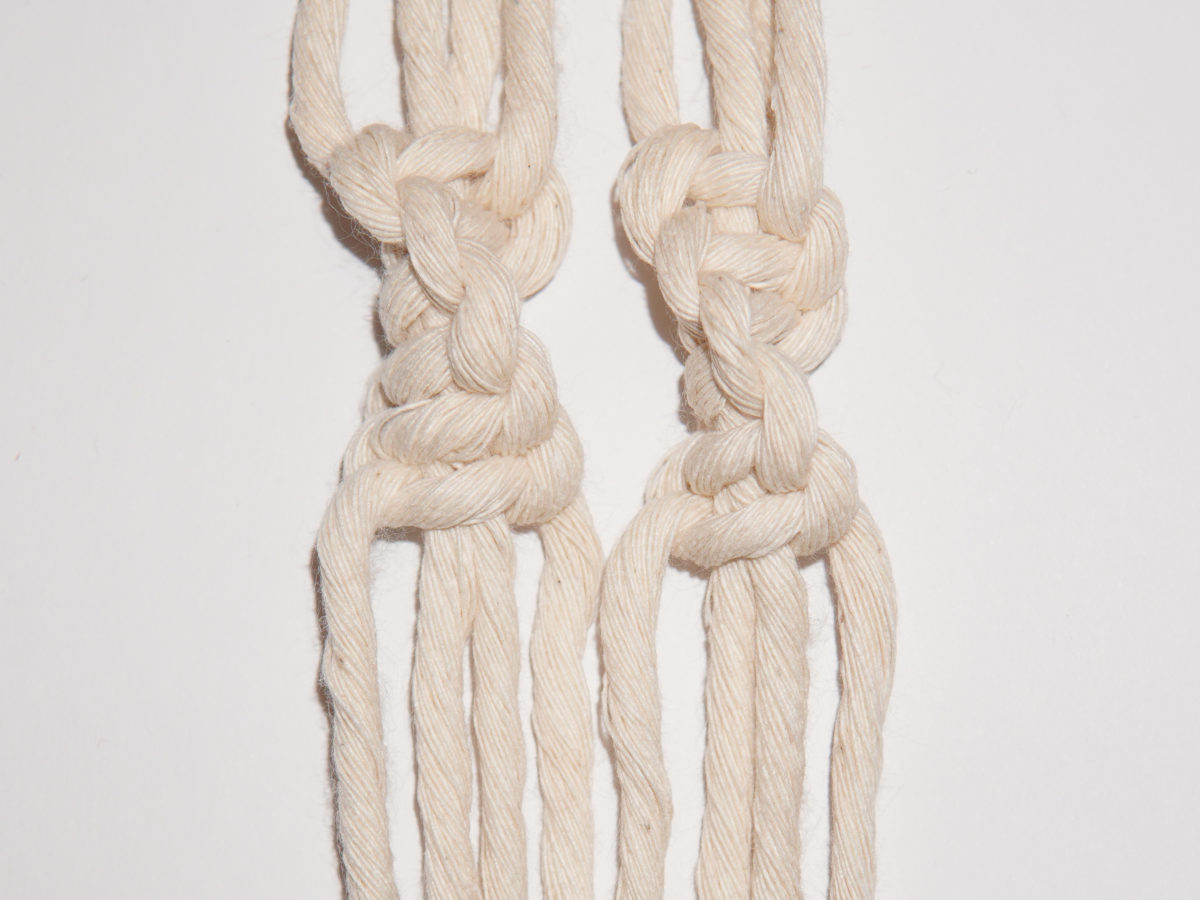
2
Now tie another spiral stitch strand with the four right-hand cords.
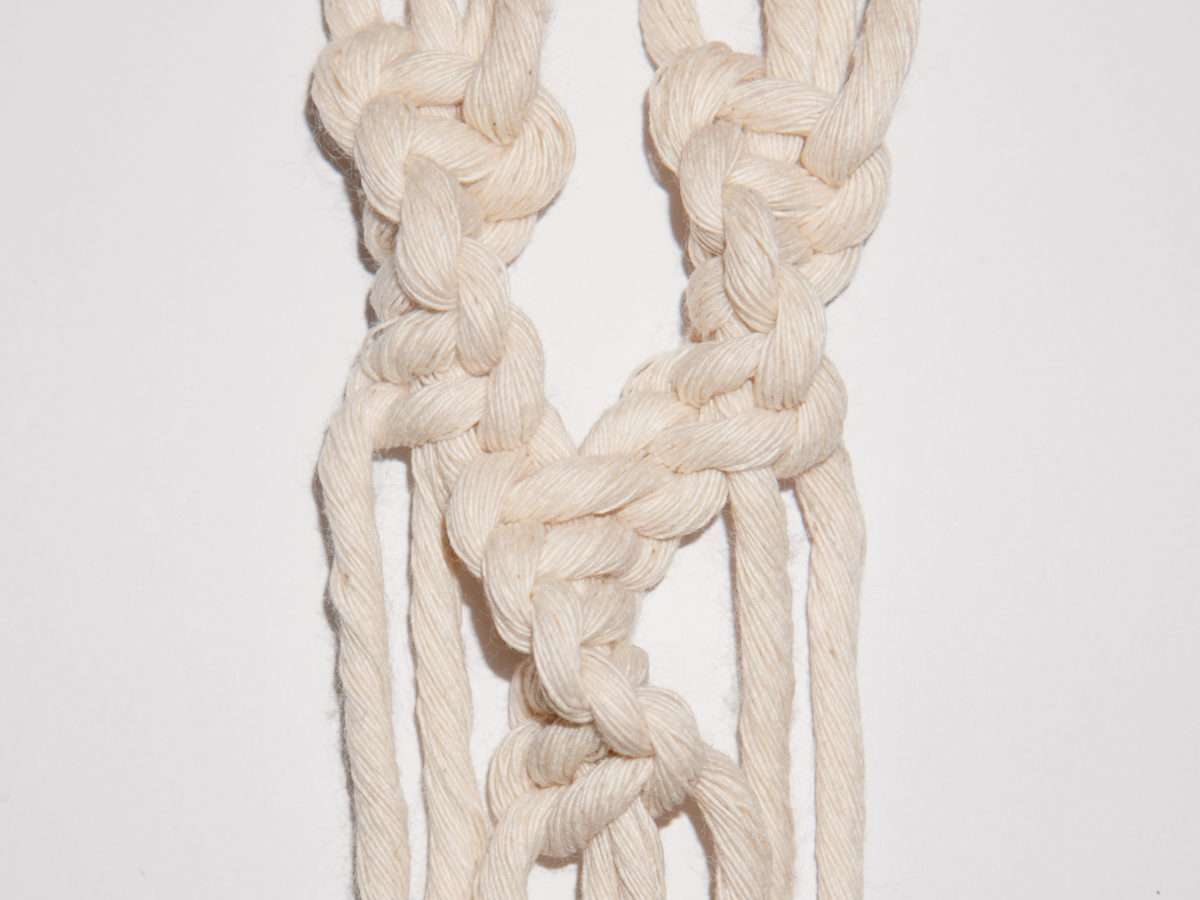
3
Now take the four cords in the centre and tie another spiral stitch with them. And this is what the principle looks like.
You would then continue the next row from step 1 with the four left-hand cords.
That’s it! Now you know the common variants of the spiral stitch. If you don’t understand a step or have further questions, feel free to write in the comments.
Have fun knotting!

0 Comments