Macrame Knots – Square Knot

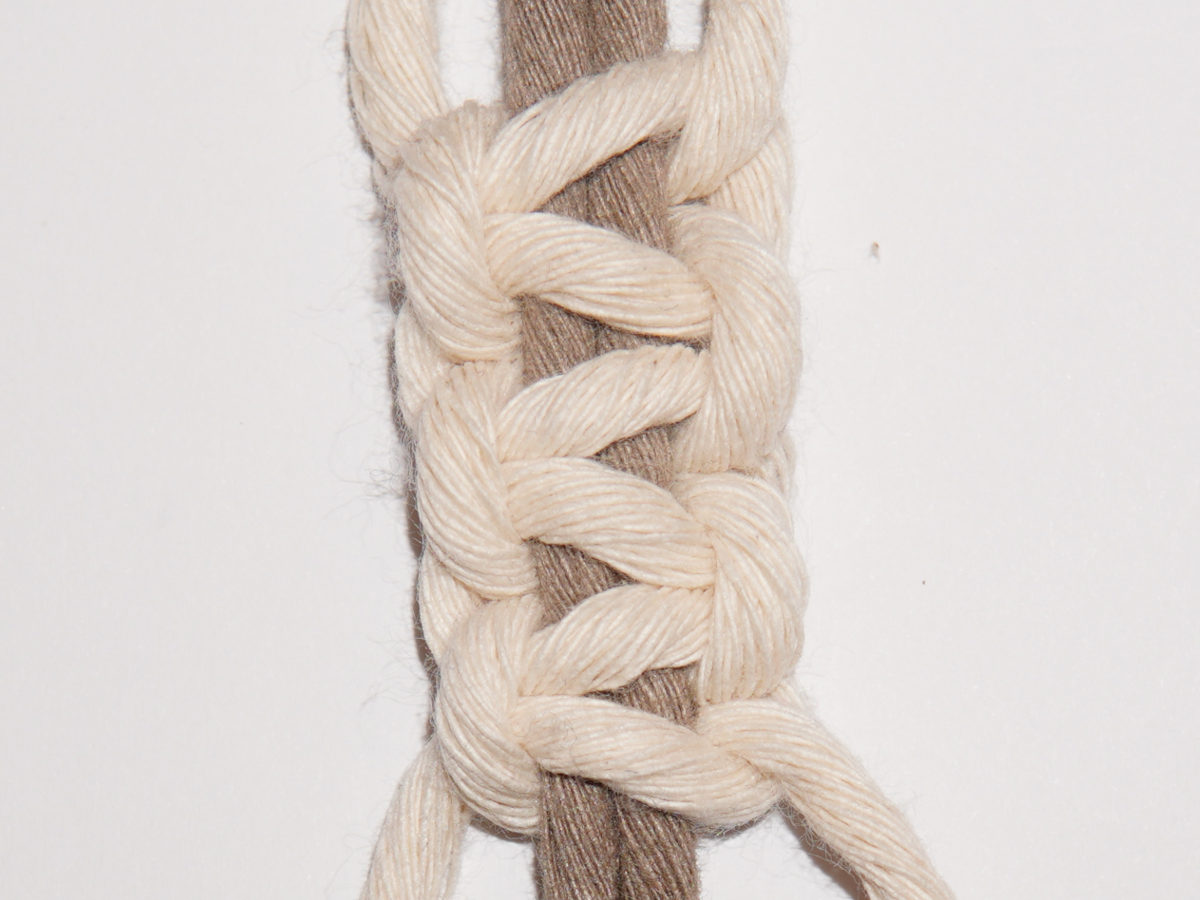
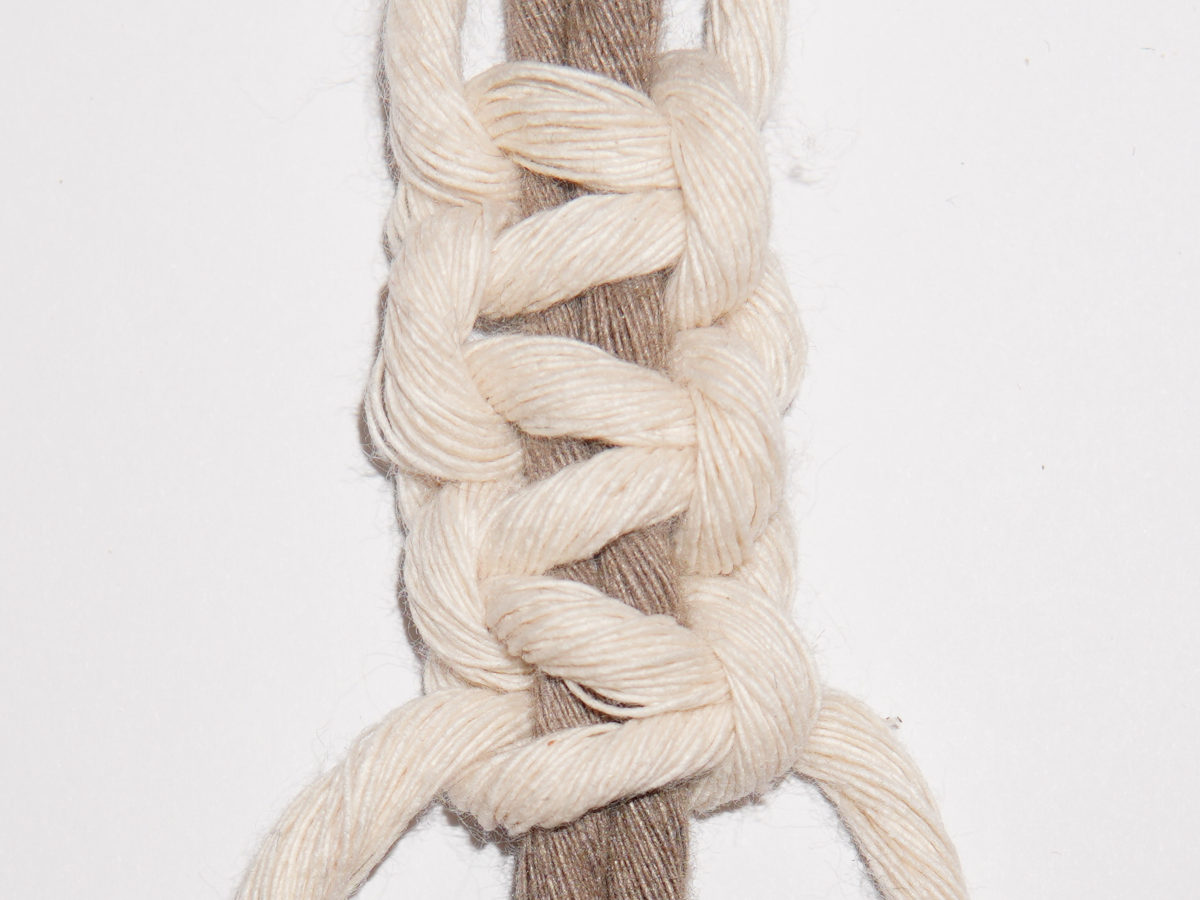
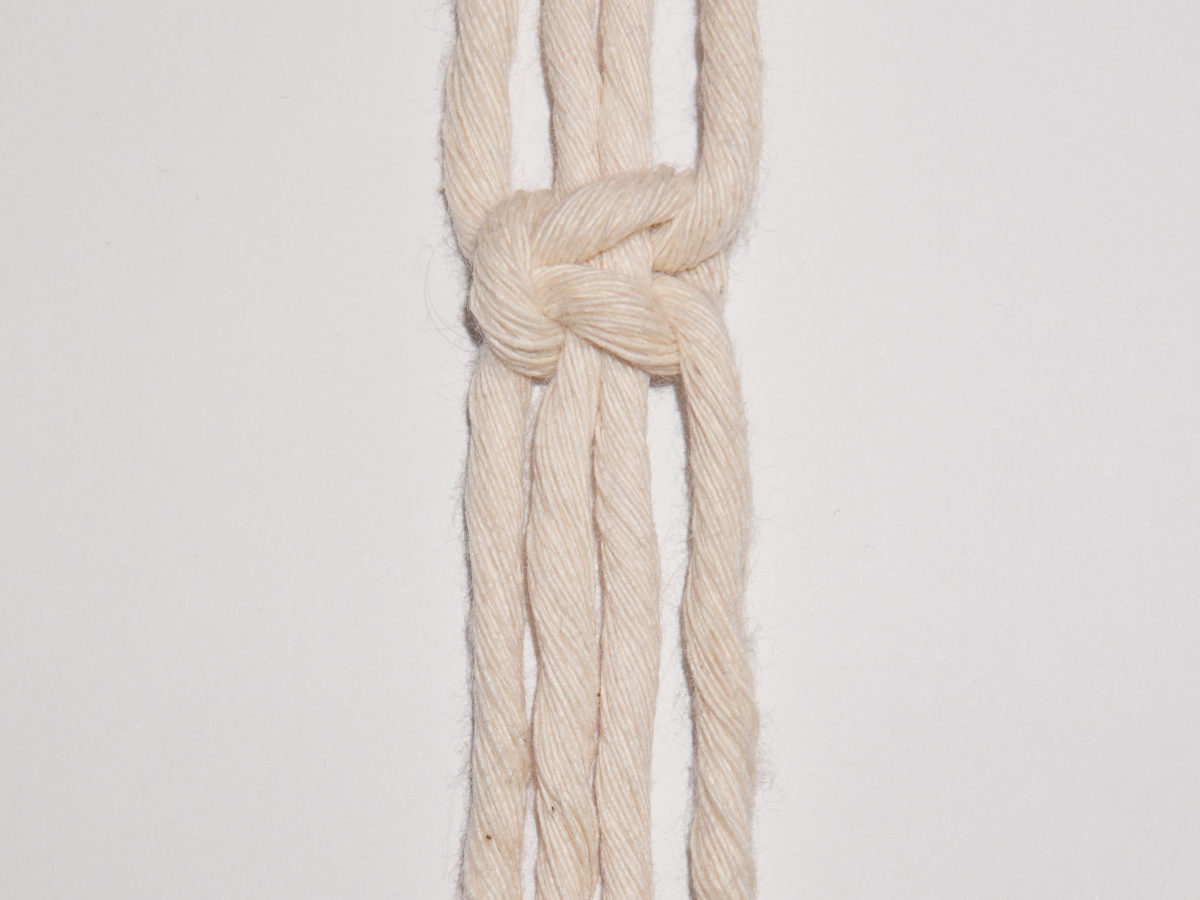
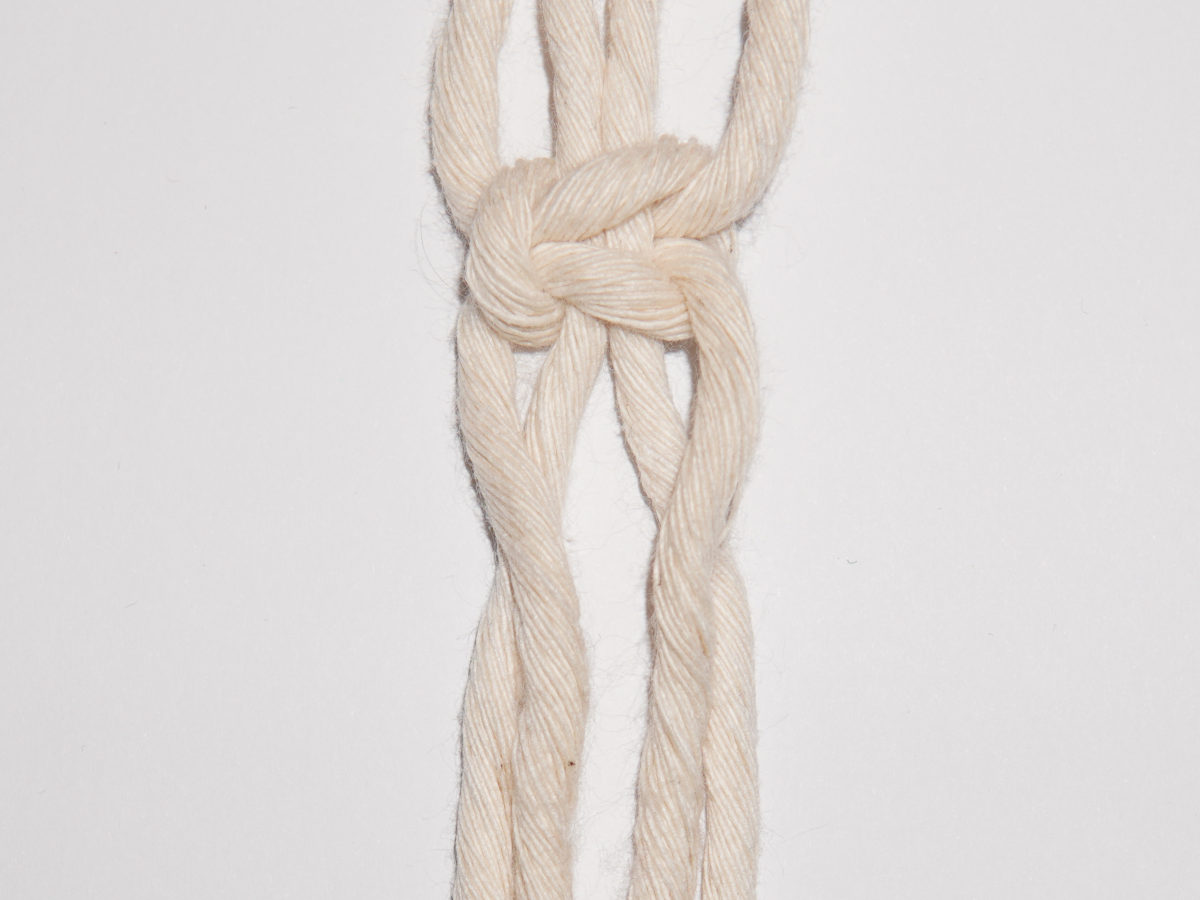
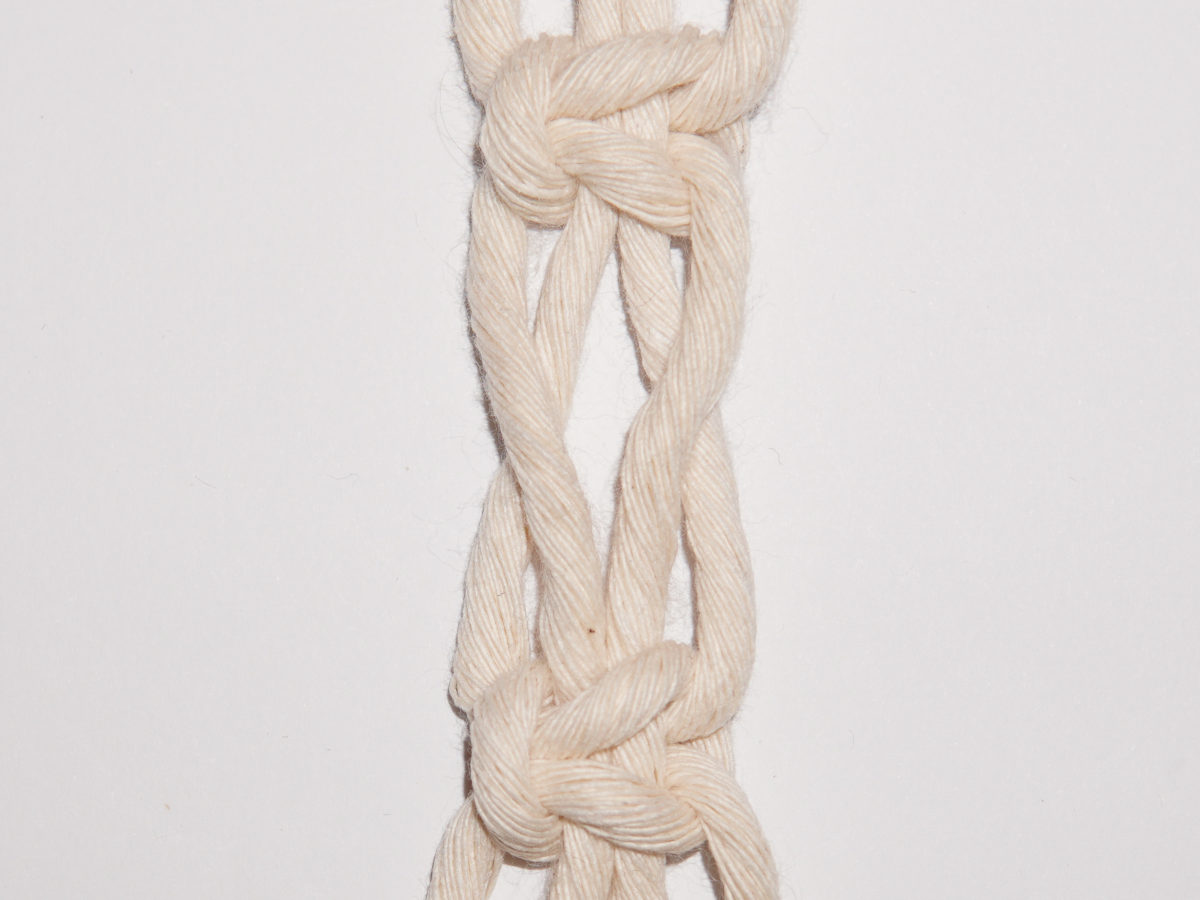
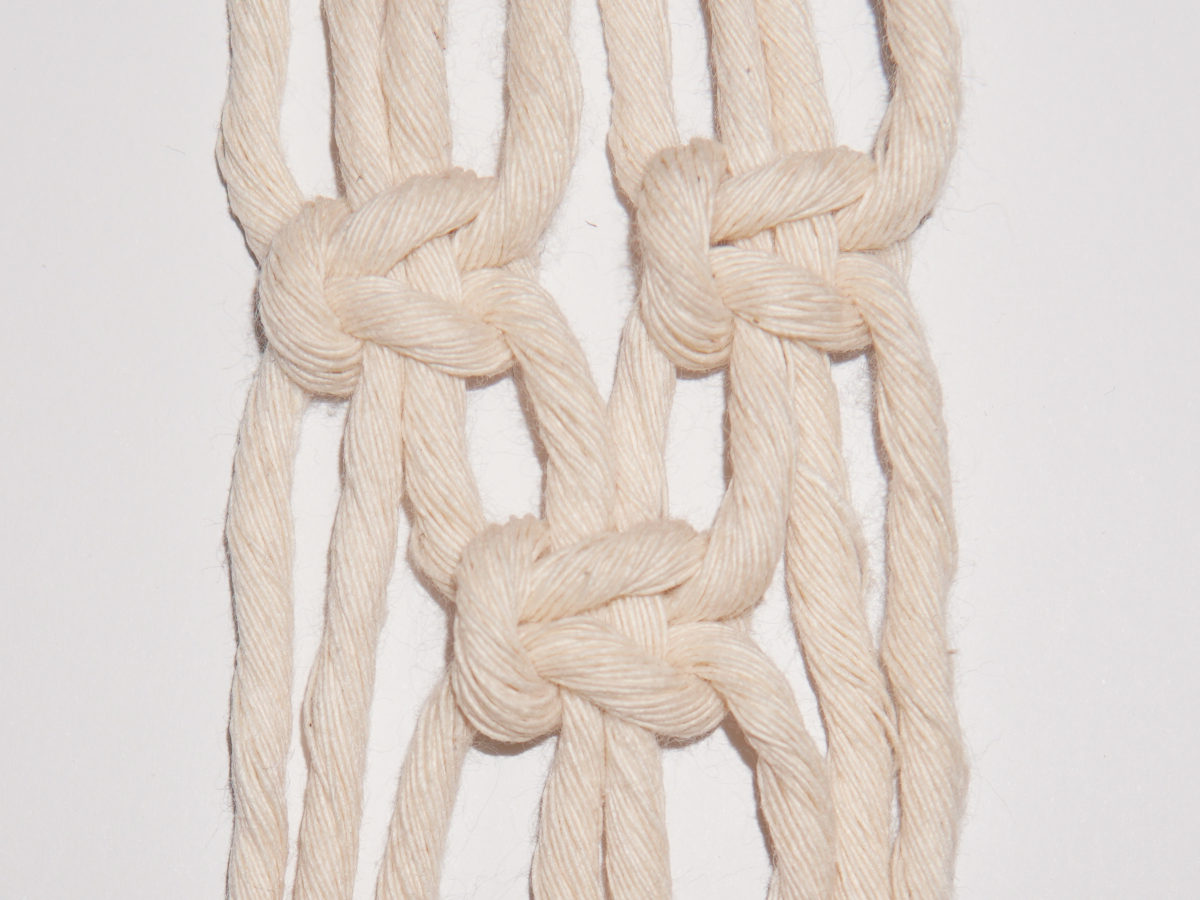
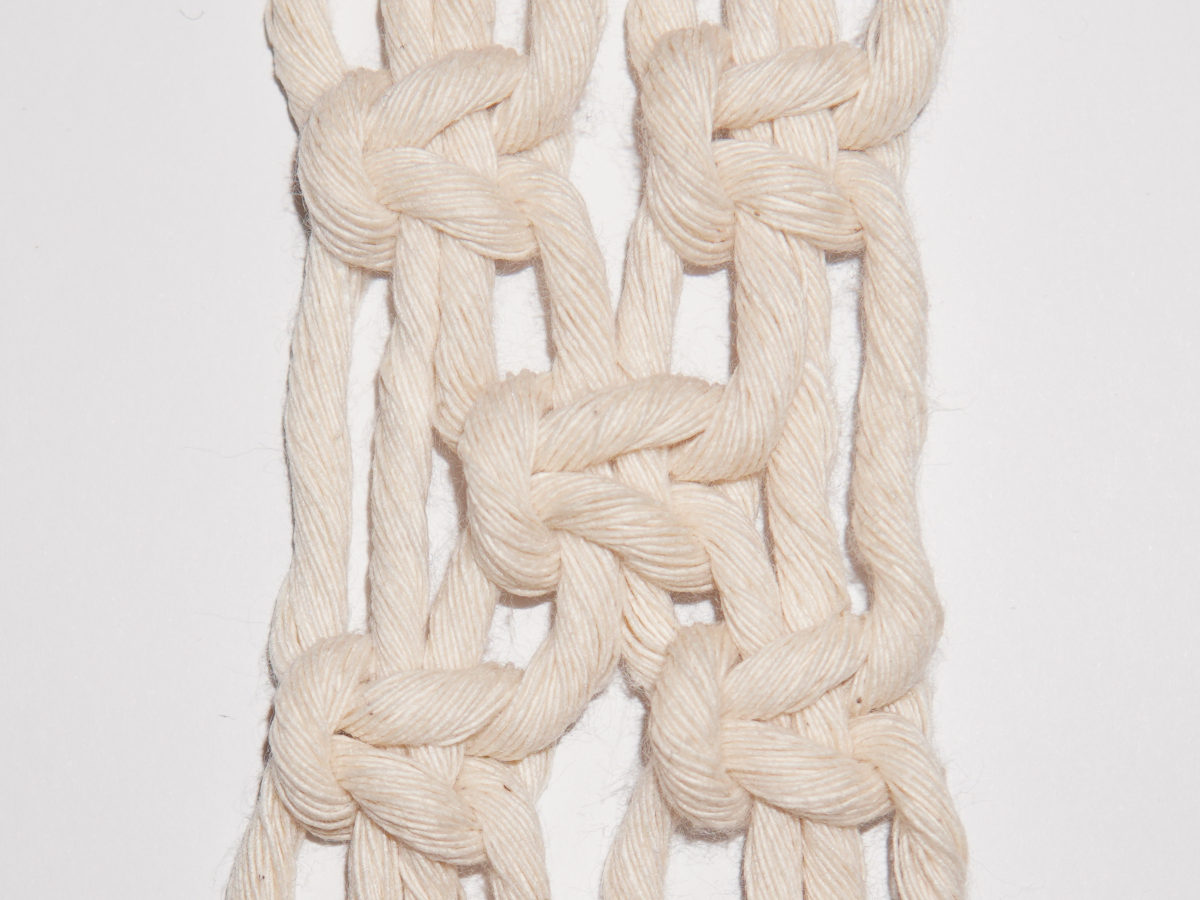
One of the most important macrame knots is the square knot. I don’t think any other knot is used as often as this one. This may be because it is so versatile. You can use it to knot strands or even entire surfaces.

Square Knot Basics

The simple square knot can be tied either to the left or to the right. Which direction you choose is entirely up to you. You will probably develop a preference at some point and only use one of these variants. It is important that once you have started with one version of a strand, you stick with it.
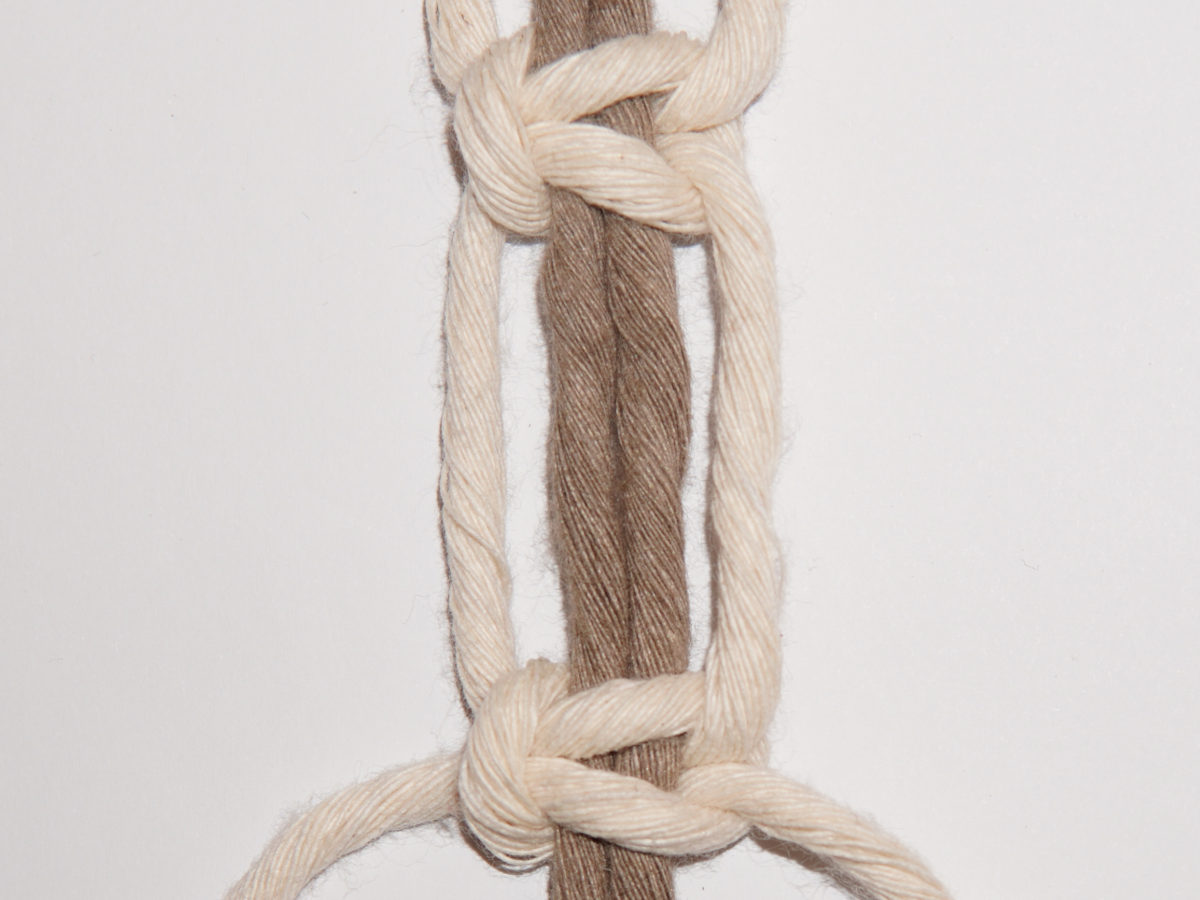
You need four strands for this knot. The two outer ones are the working cords (light-coloured cords), the two inner ones are the filler cords (dark-coloured cords). The filler cords are usually just lying around passively.

Schwere Feder Teil 1

1

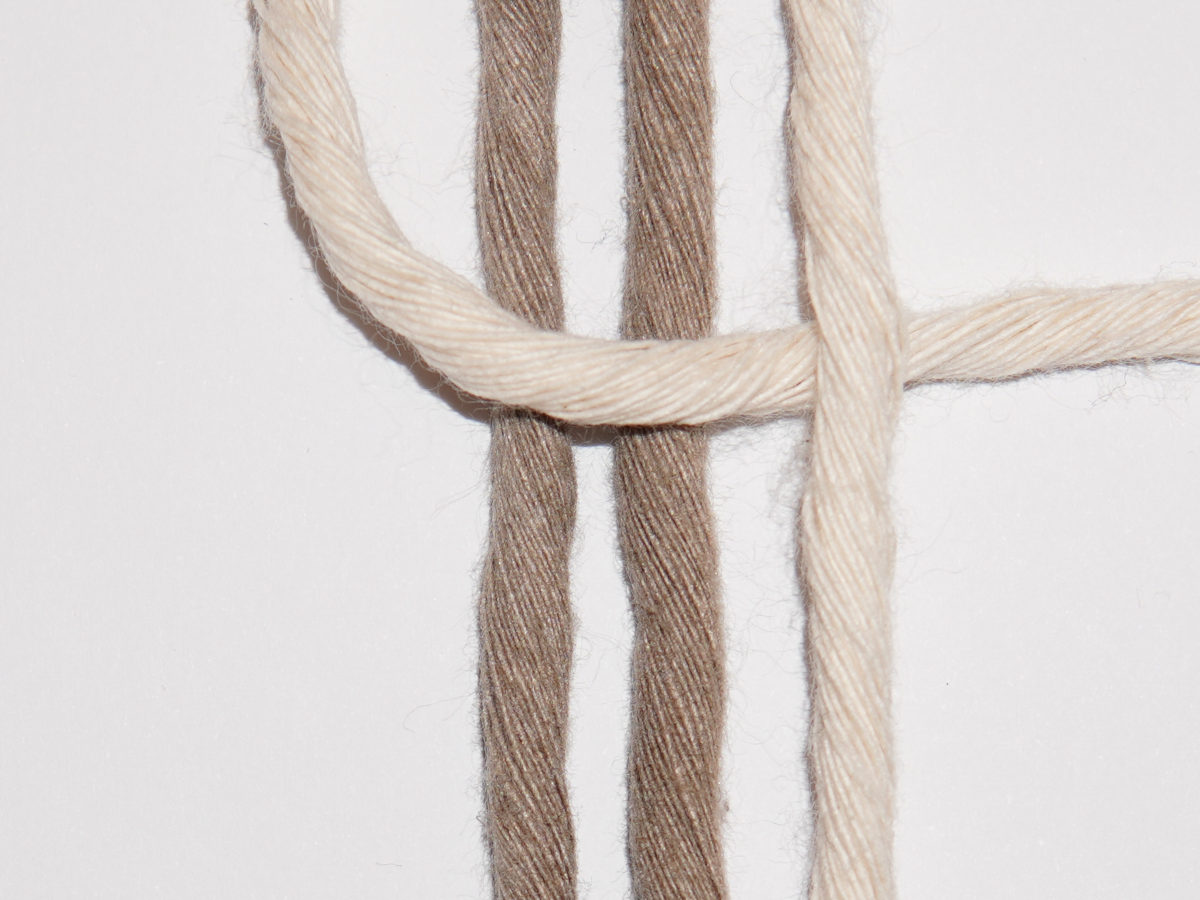
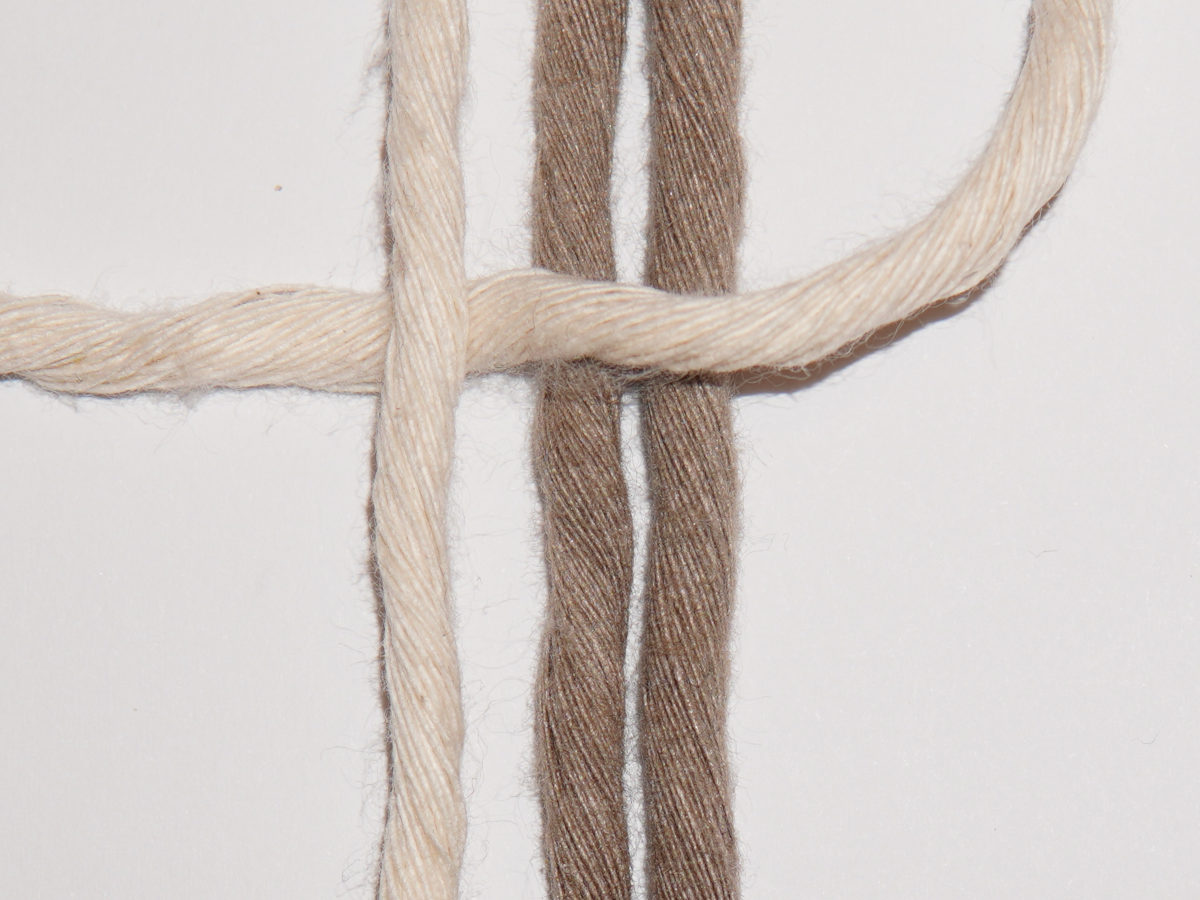
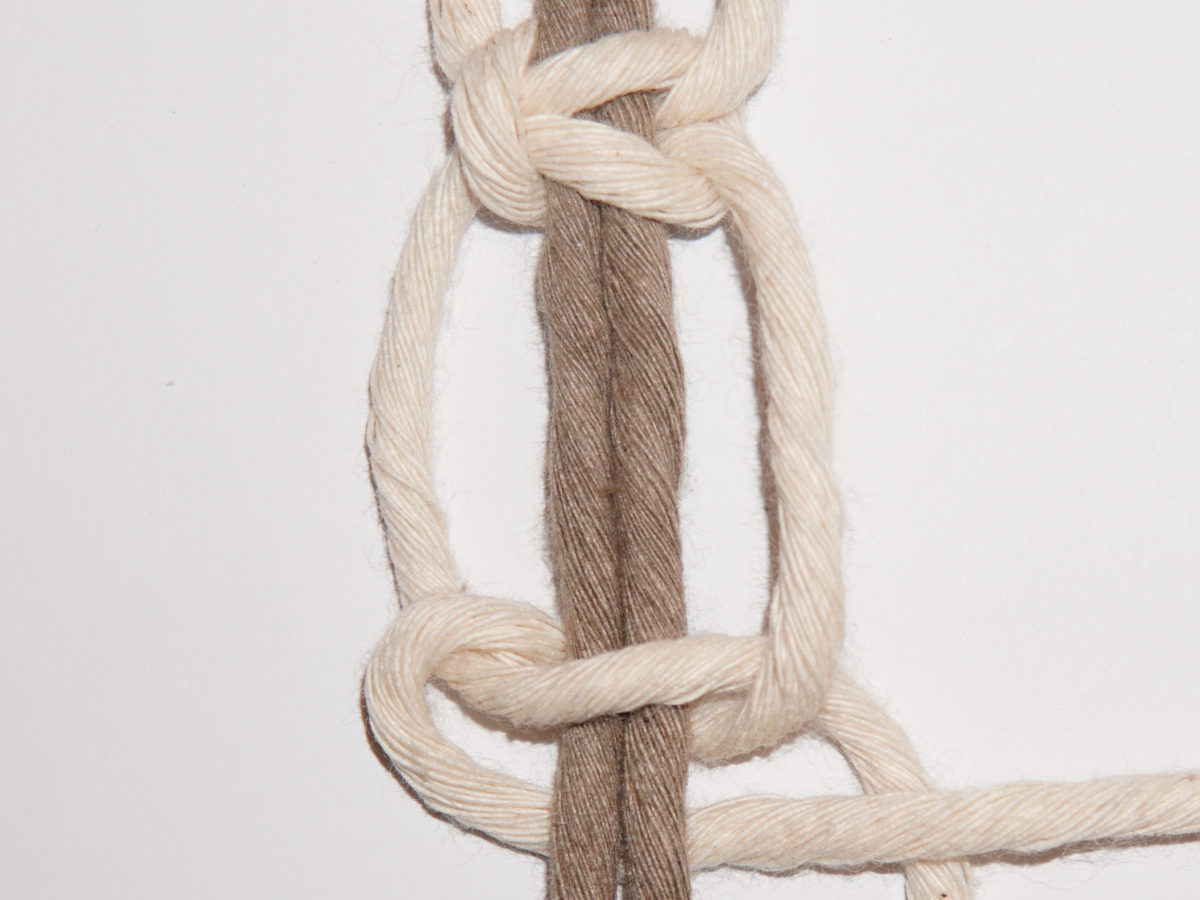
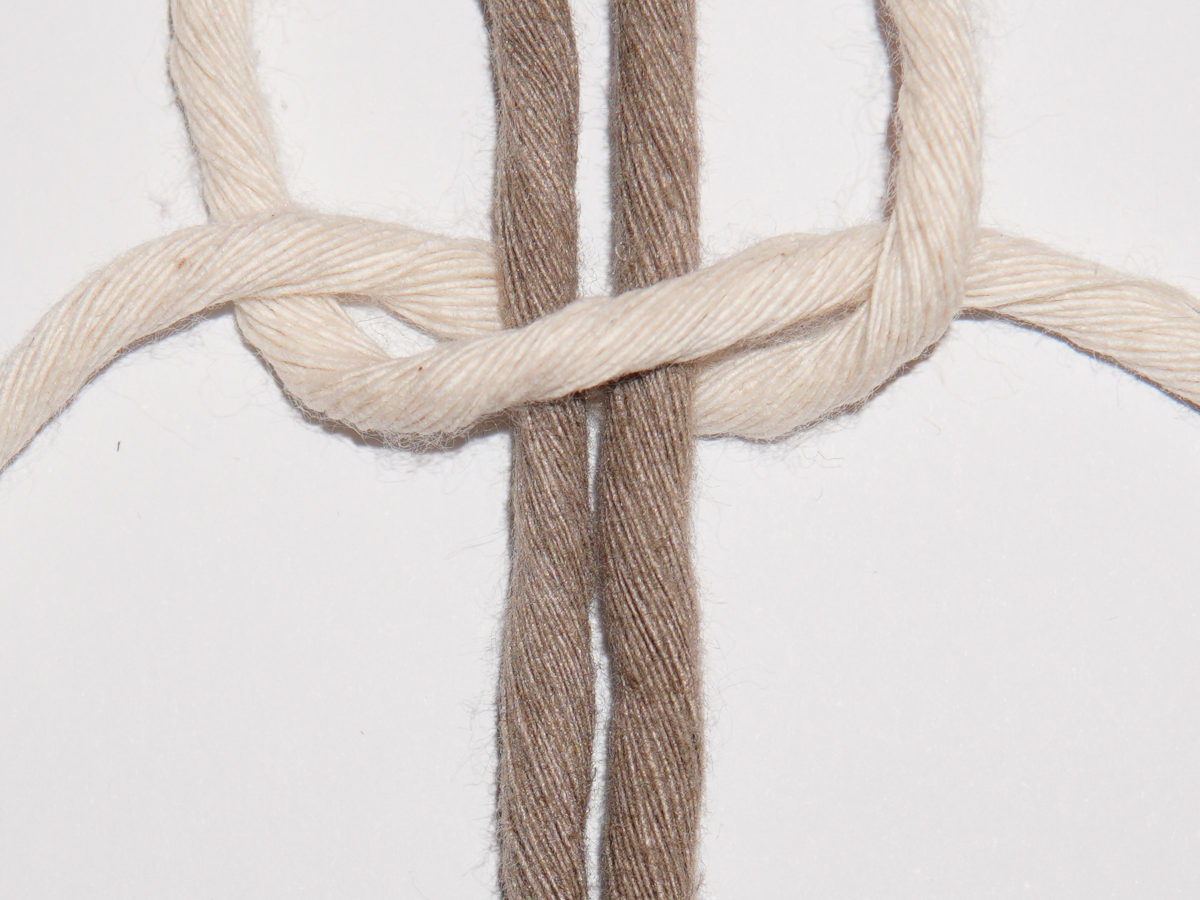
Start with the left working cord. First place it over the two filler cords and then under the right working cord.
Schwere Feder Teil 1

2

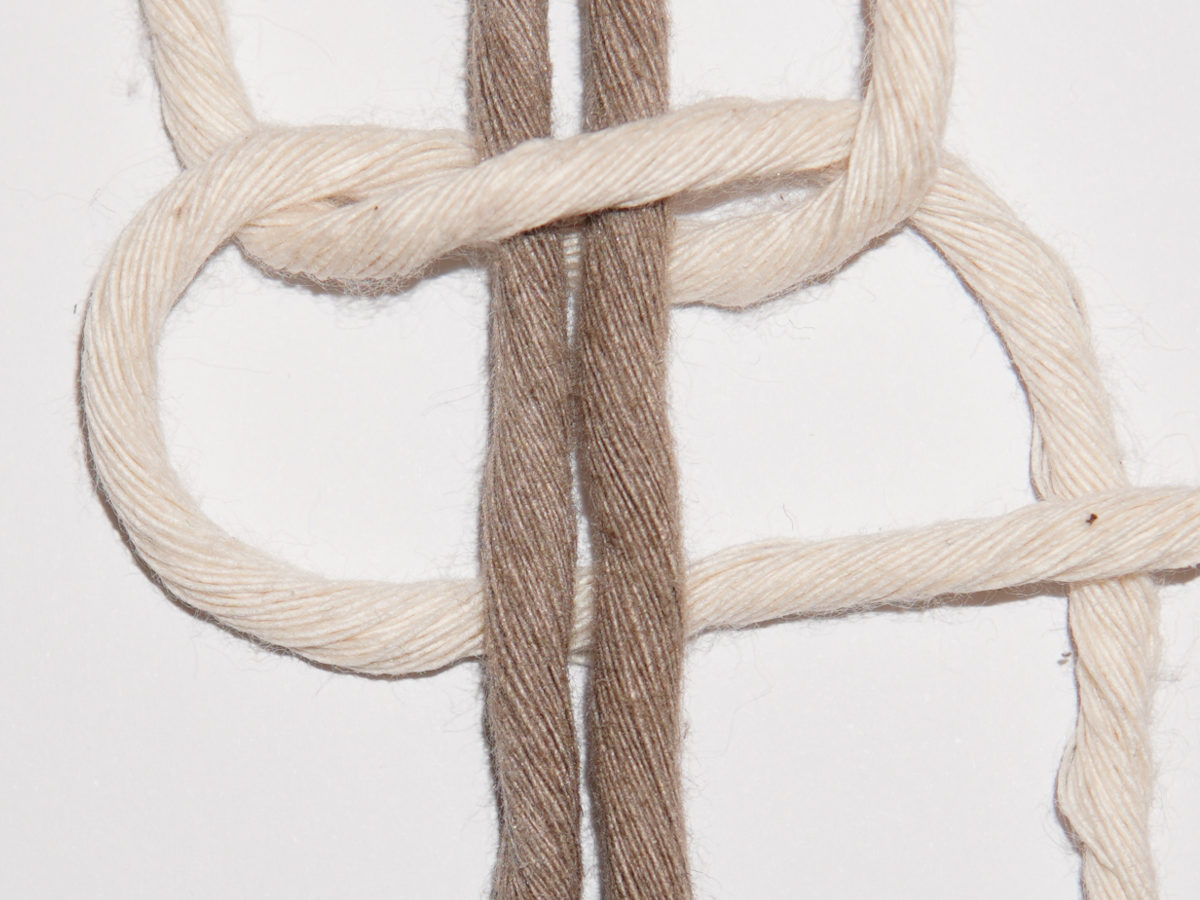
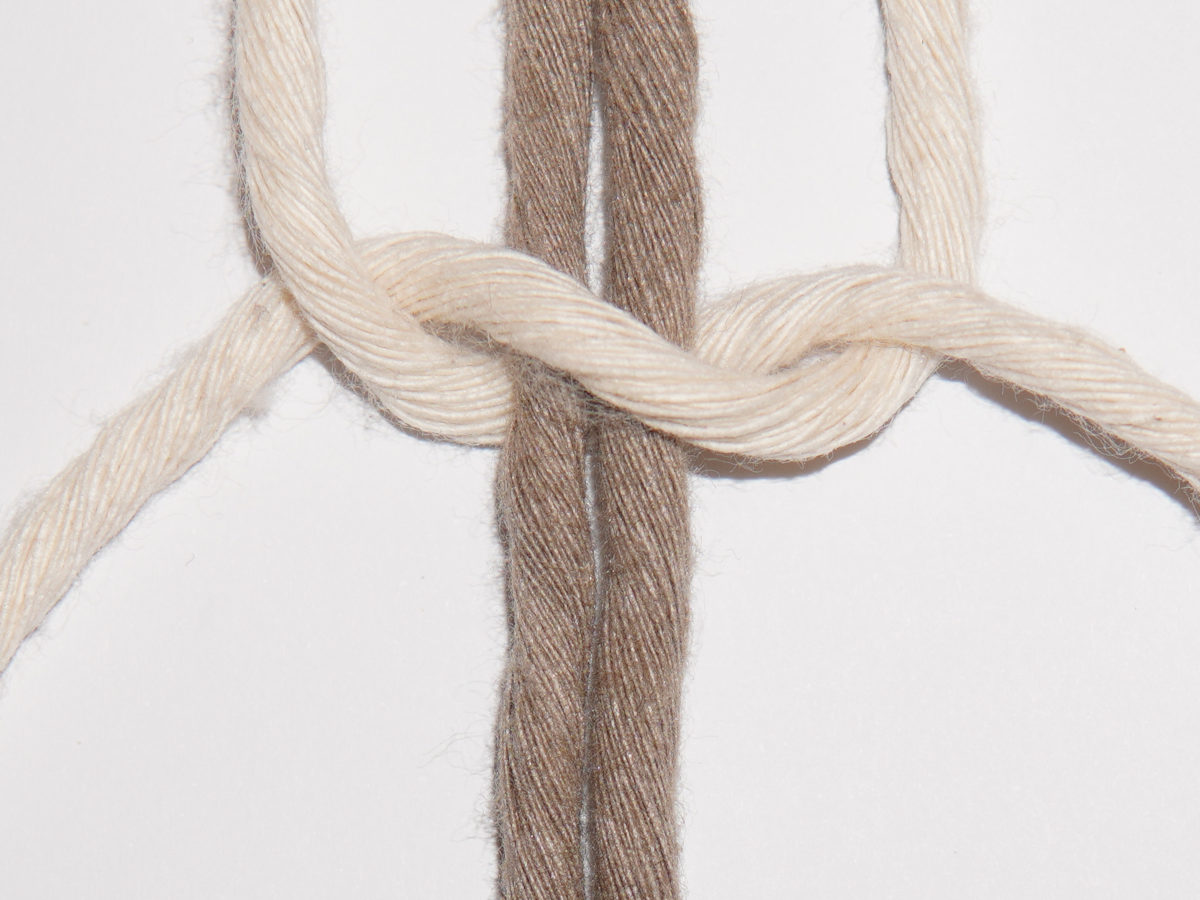
Now take the right working cord and pass it under the two guiding threads. Then pass it over the left working cord from behind.

Schwere Feder Teil 1

3

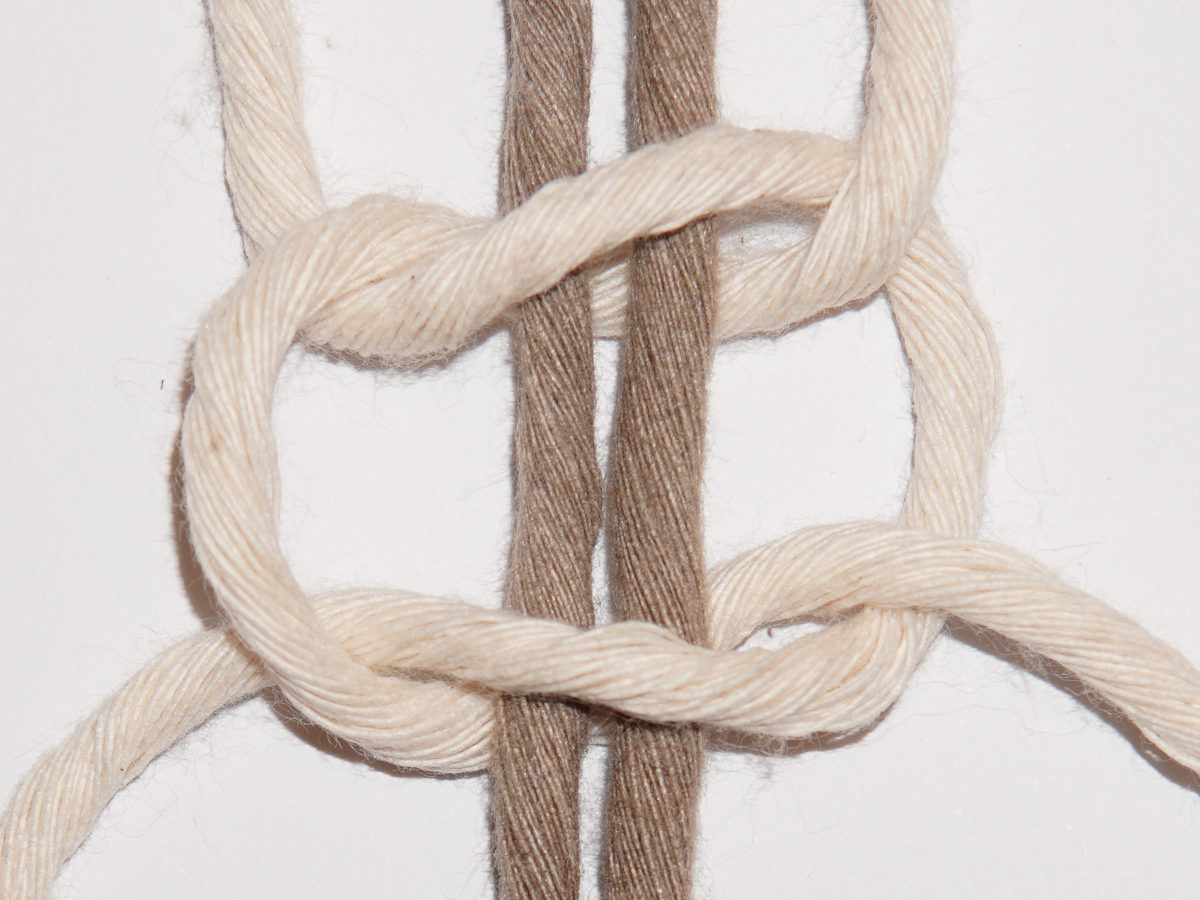
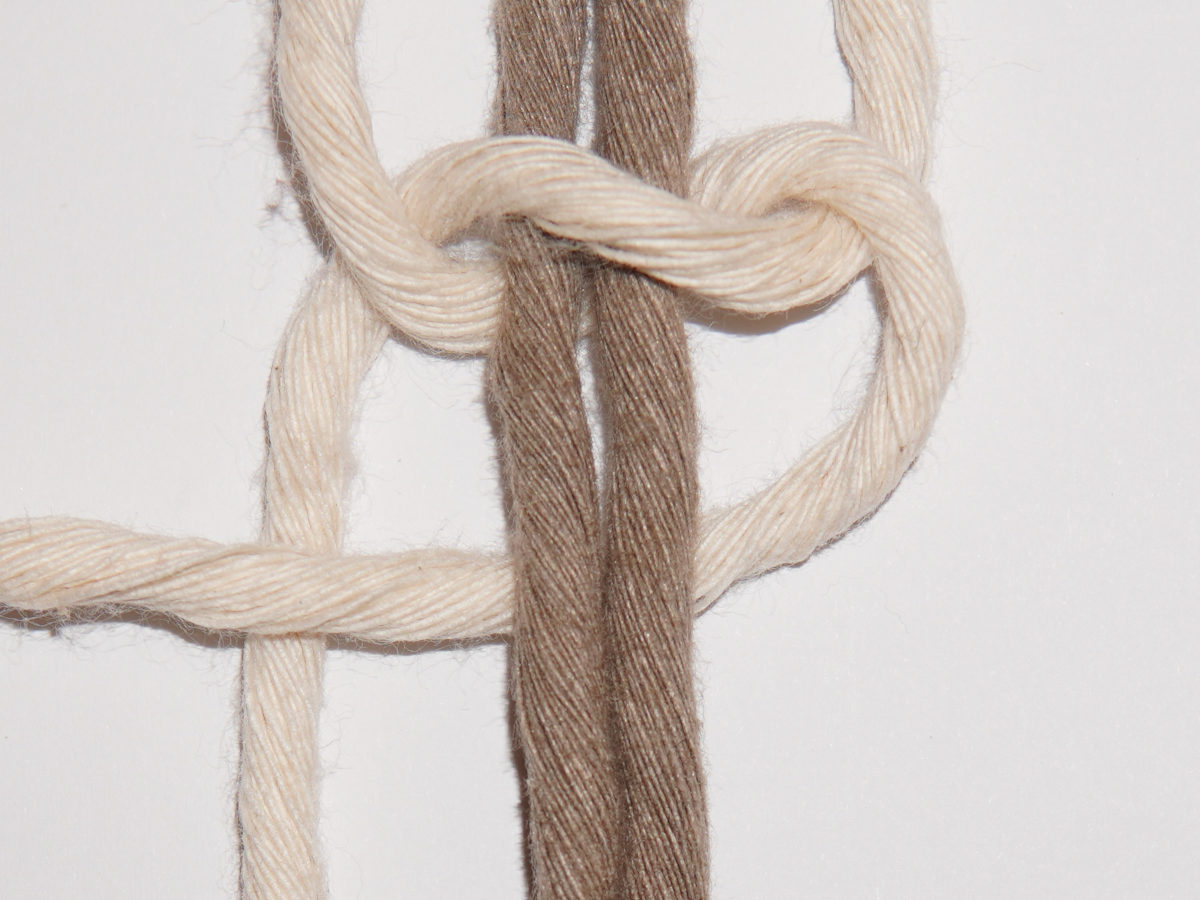
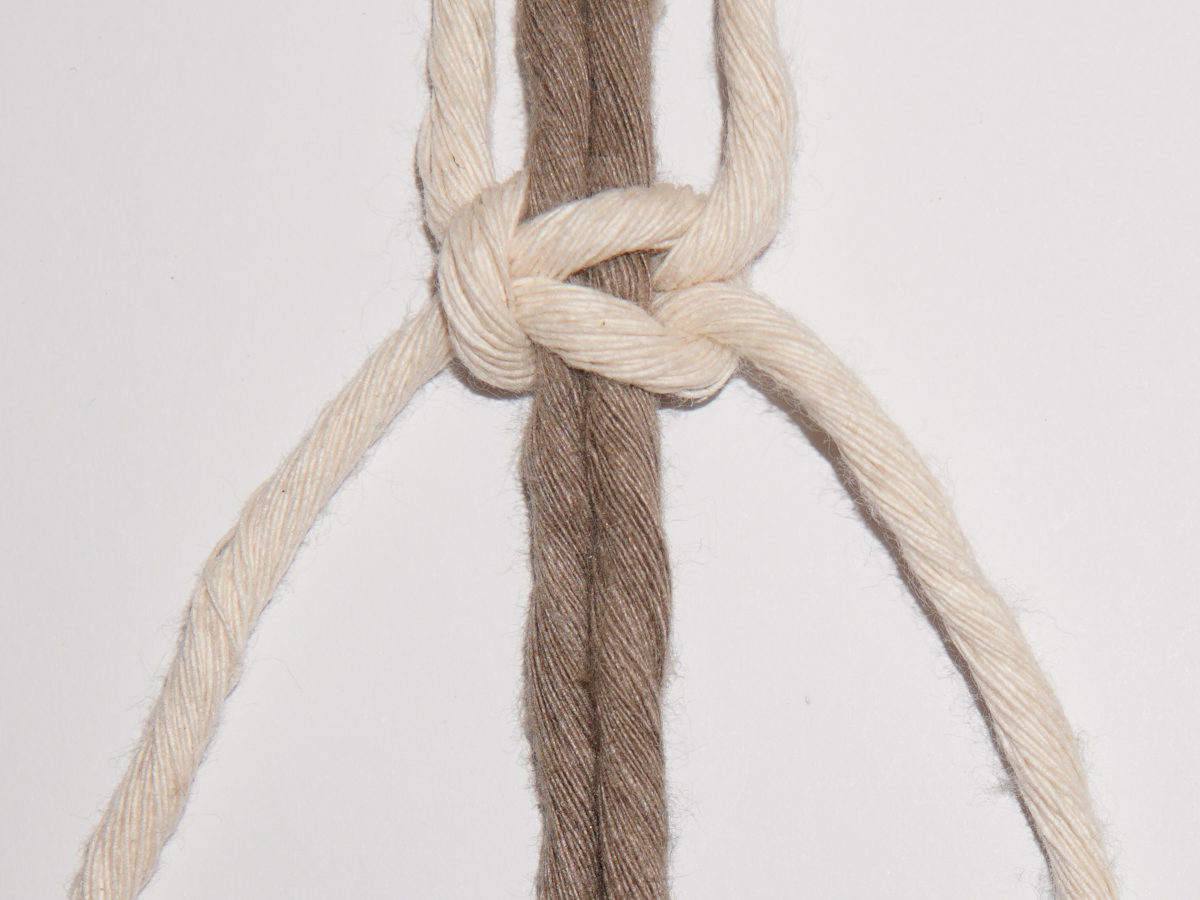
Now take the left working cord again and this time pass it under the two filler cords. Then place it over the right working cord.

Schwere Feder Teil 1

4

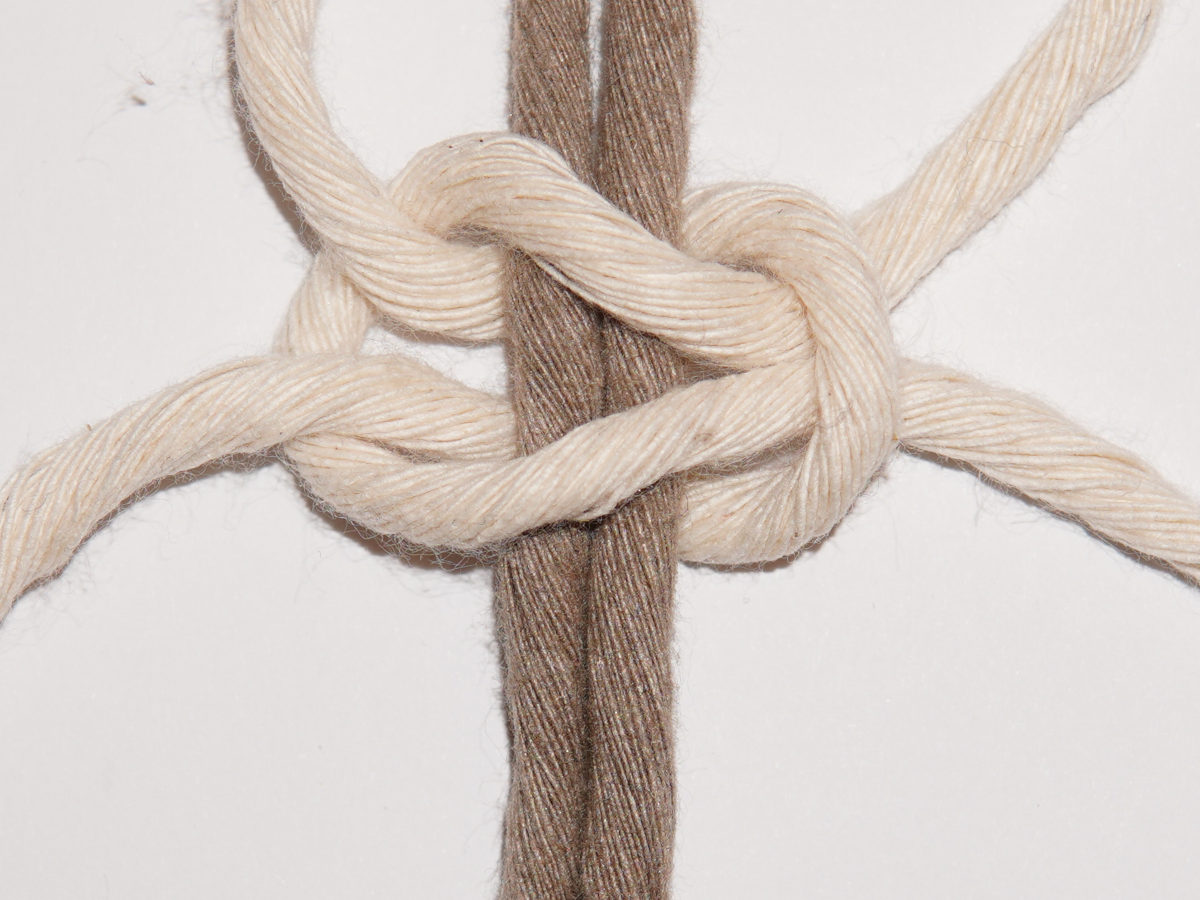
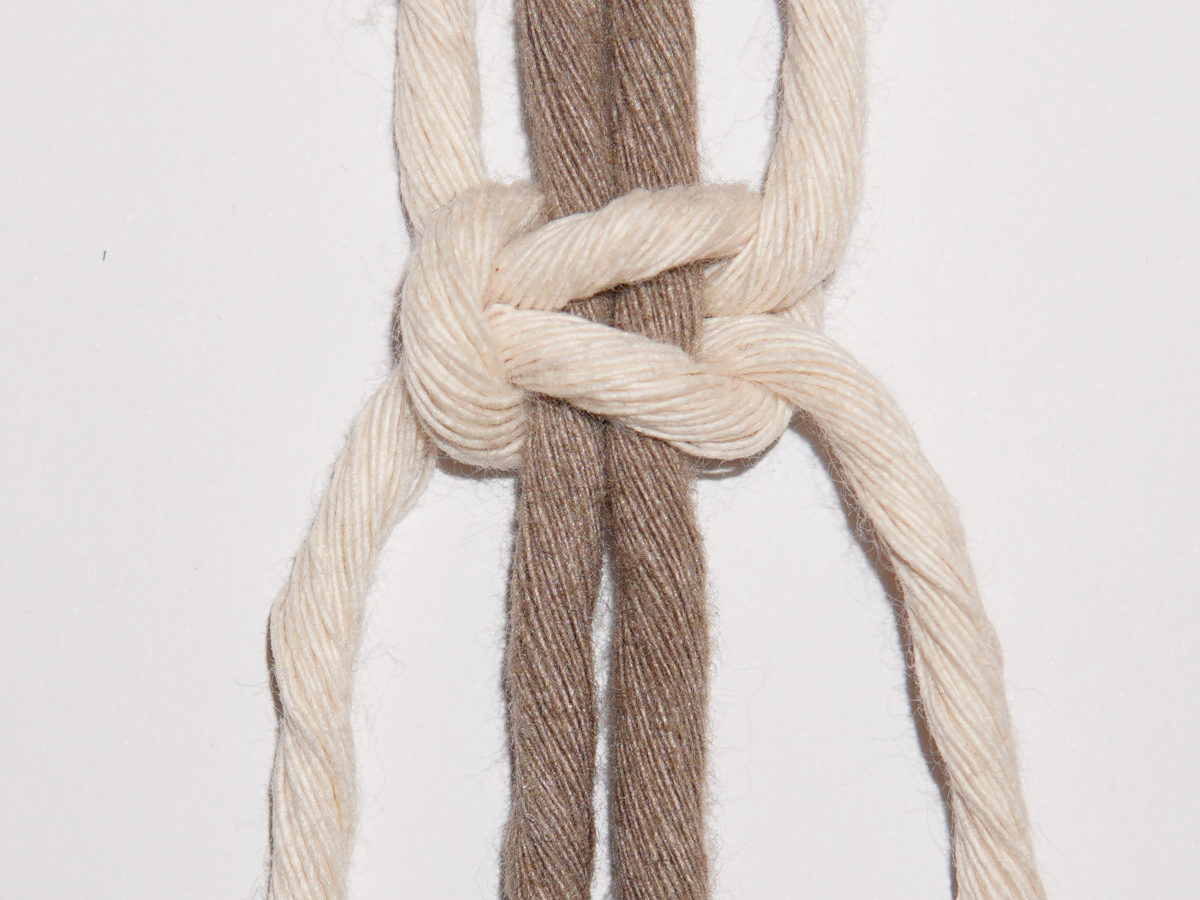
Then take the right working cord, place it over the two filler cords and guide it backwards through the loop of the left working cord.
Schwere Feder Teil 1

5

Now pull the working cords tight. This is easier if you pull the two filler cords down tightly.

Schwere Feder Teil 1

6

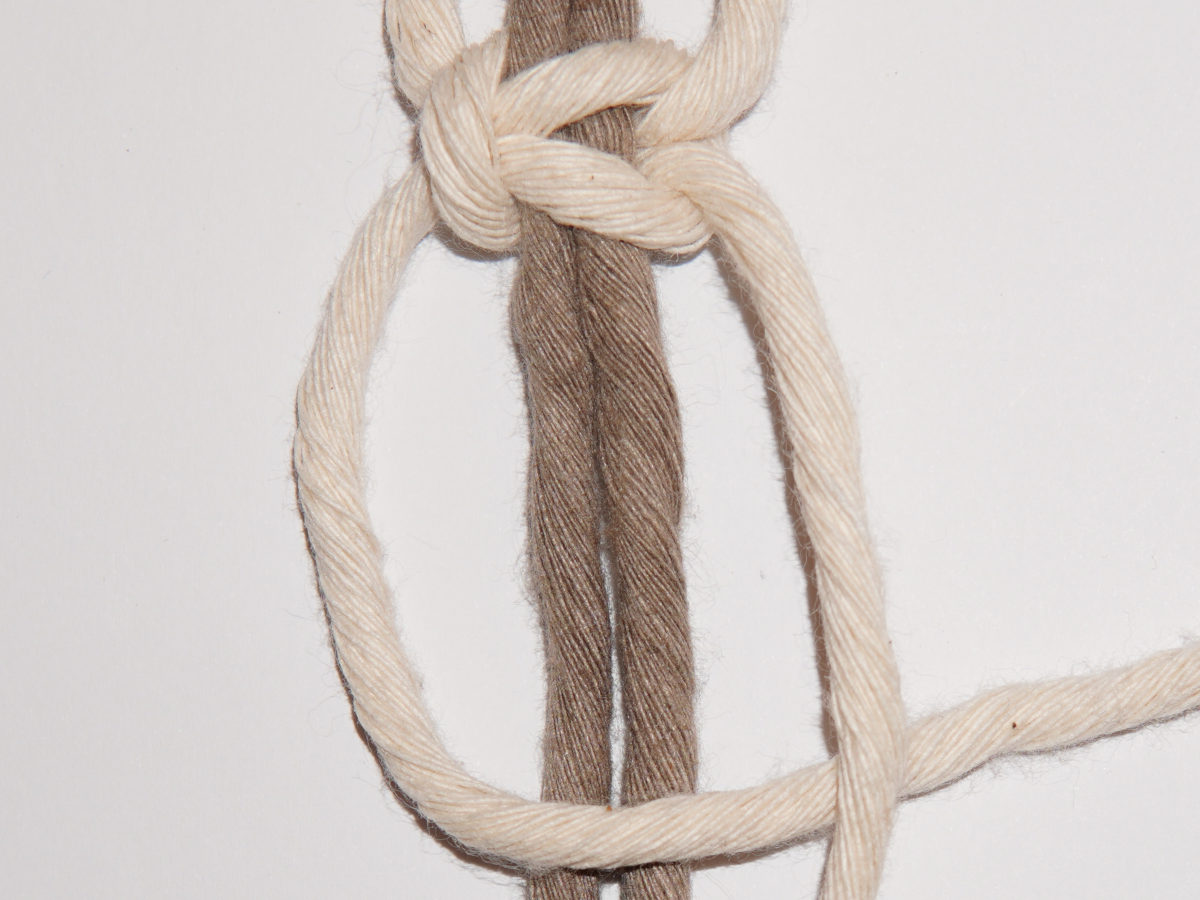
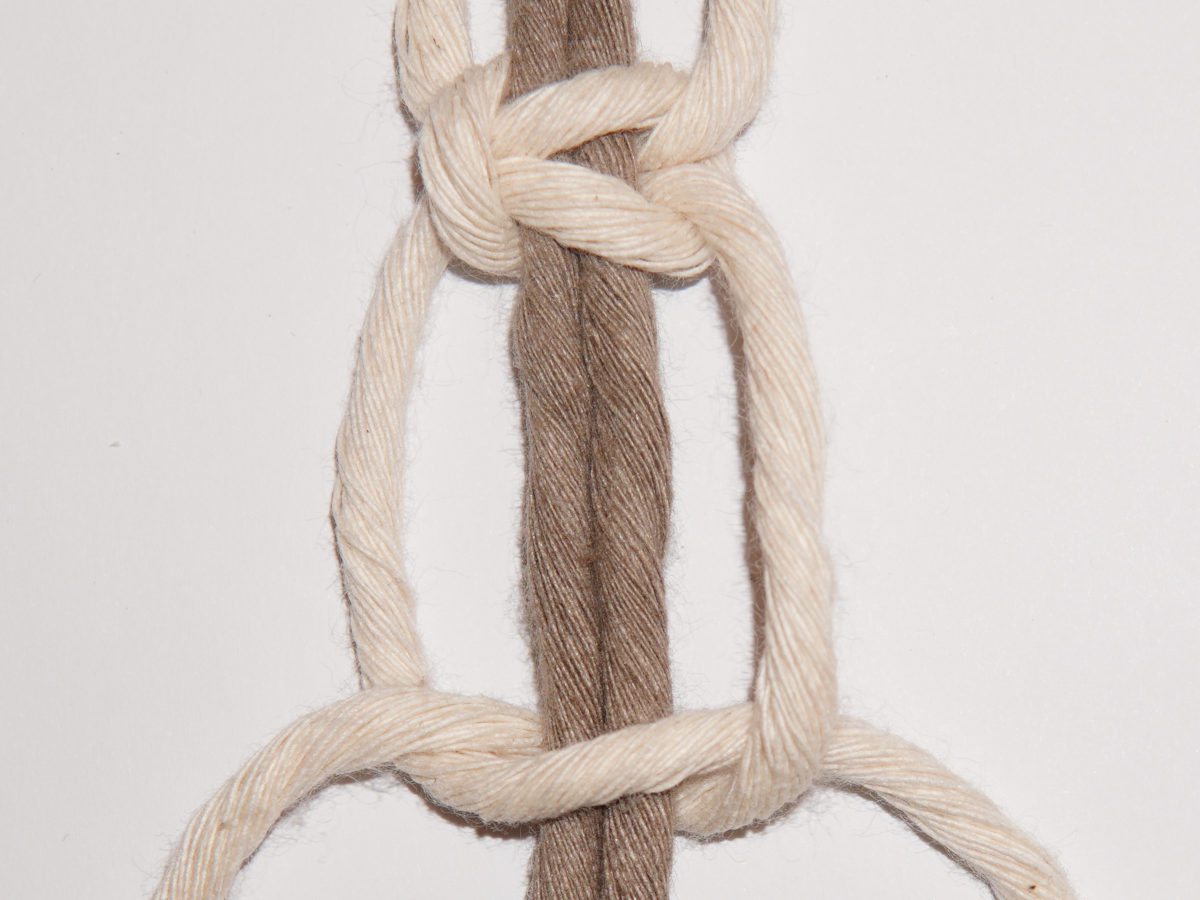
Repeat these steps over and over again, to have a strand of square knots.

Right-Facing

Schwere Feder Teil 1

1

Here you start with the right working cord. First place it over the two filler cords and then under the left working cord.

Schwere Feder Teil 1

2

Now take the left working cord and pass it under the two filler cords. Then pass it over the right working cord from behind.

Schwere Feder Teil 1

3

Now take the right working cord again and this time pass it under the two filler cords. Then place it over the left working cord.

Schwere Feder Teil 1

4

Then take the left working cord, place it over the two filler cords and pass it backwards through the loop of the right working cord. Pull the working cords tight. This will be easier if you pull the two filler cords tightly downwards. (In the picture, the knot is not yet fully tightened)

Schwere Feder Teil 1

5

Repeat these steps over and over again, to have a strand of square knots.

Square Knot Variation

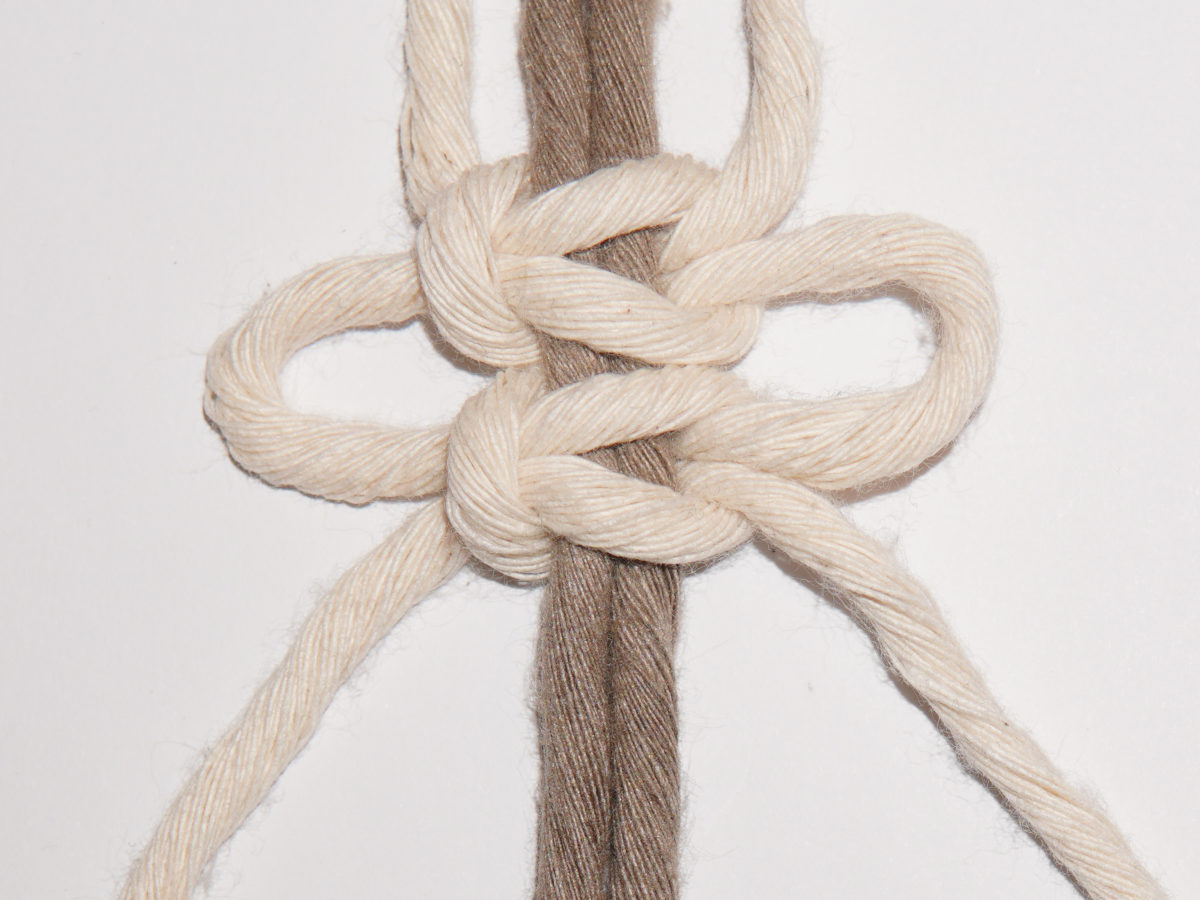
Here, the working cords are repeatedly swapped with the filler cords and vice versa. There should be enough space between the individual knots so that the pattern can be easily recognised.

Schwere Feder Teil 1

1

You tie another normal square knot. You can decide whether to tie it to the right or to the left.

Schwere Feder Teil 1

2

In the second step, place the two outer strands so that they are now the two inner strands.

Schwere Feder Teil 1

3

Now tie a normal square knot again. And the knot is finished.

Alternating Square Knot

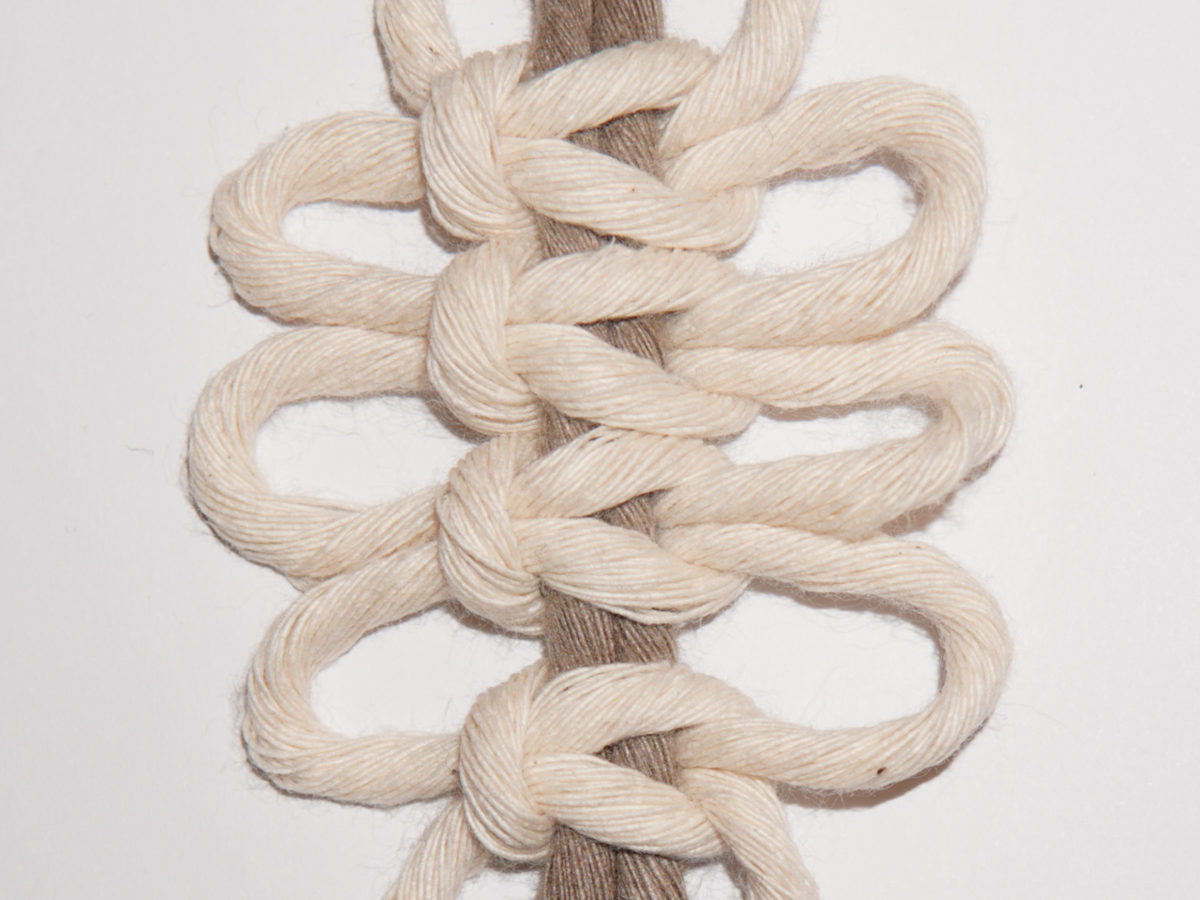
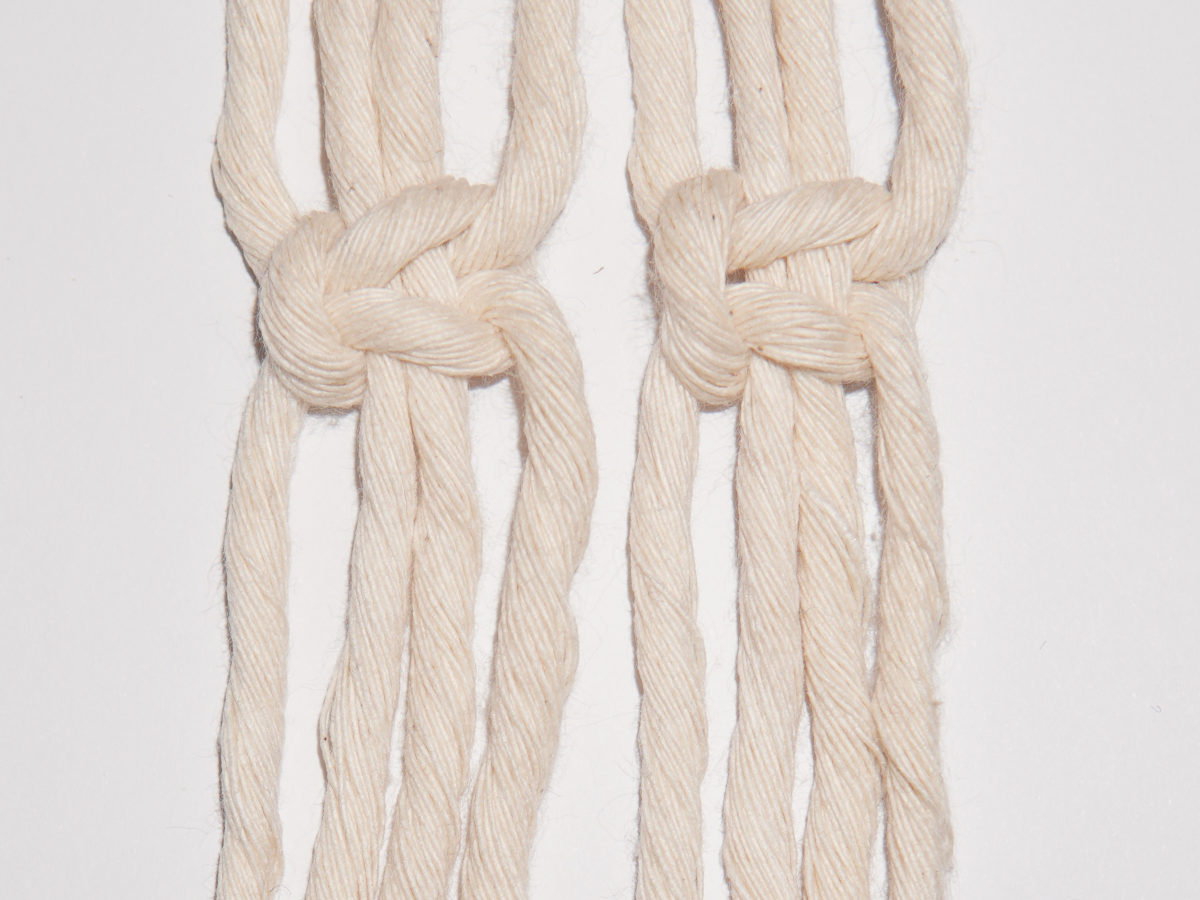
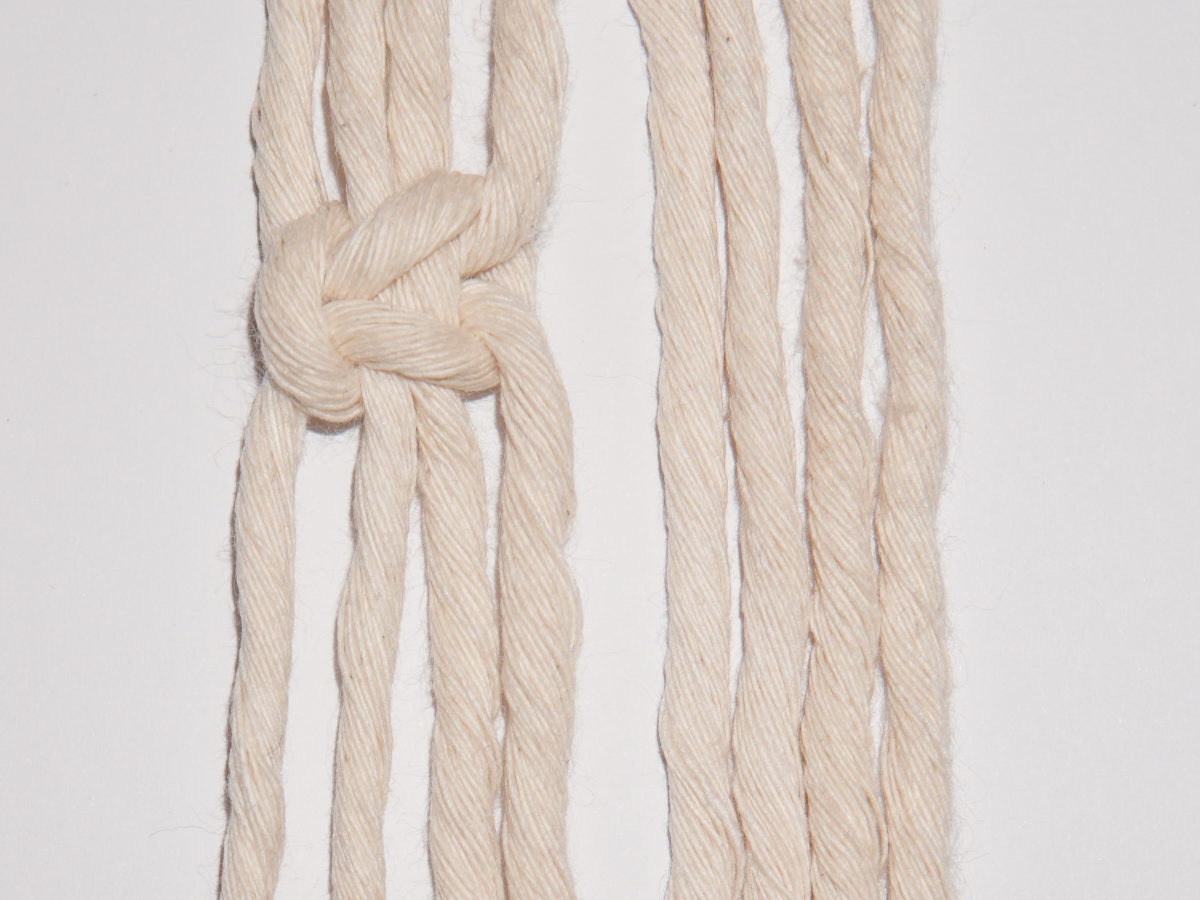
The alternating square knots work particularly well on larger areas. Basically, they are nothing more than several square knots that are tied next to each other and offset below each other.
Depending on how many square knots you want to have next to each other, you will need a corresponding number of strands. In this example, we are tying two knots next to each other and therefore we need 8 strands.
Schwere Feder Teil 1

1

The first step is to tie a square knot with the four strands on the left as normal. It’s up to you whether this is to the left or right.

Schwere Feder Teil 1

2

Then take the four right-hand strands and tie a normal square knot with them. Preferably in the same direction as the first knot.

Schwere Feder Teil 1

3

Now tie another square knot with the two right strands of the left knot and the two left strands of the right knot.

Schwere Feder Teil 1

4

For the next row, take the four outermost strands again and tie normal square knots.

That’s it! Now you know the common variations of the square knot. If you don’t understand a step or have further questions, feel free to write in the comments.

Have fun knotting!
0 Comments

Submit a Comment

Your email address will not be published. Required fields are marked *